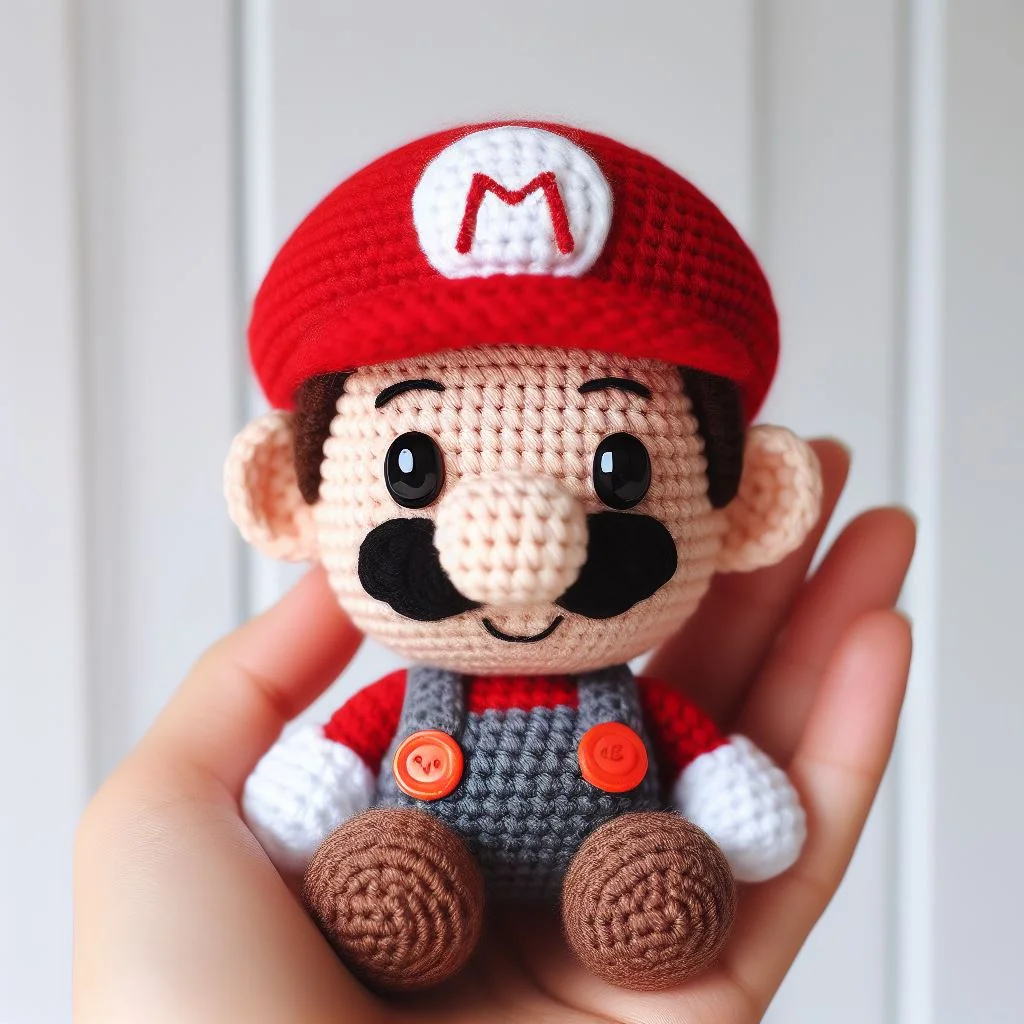
This delightful crochet rendition captures the essence of the iconic video game character, Mario, with a heartwarming touch of handmade charm. The amigurumi style, a Japanese art of knitting or crocheting small, stuffed yarn creatures, is on full display here, bringing a beloved character into the realm of tactile art.
The craftsmanship involved in this piece uses a fine, tight crochet technique to ensure a neat and durable finish, suitable for both collectors and children alike. The character’s signature red hat is topped with a crisp, white “M” emblem, instantly recognizable and exquisitely rendered in yarn. The use of button embellishments for the overalls lends a whimsical, almost storybook-like quality to the figure, inviting a sense of play and nostalgia.
Materials:
- Yarn: Red, light skin-tone, blue, brown, black, white
- Crochet hook: Size appropriate for your yarn (commonly 2.5mm-3.5mm for amigurumi)
- Safety eyes: Black (8mm diameter)
- Stuffing: Polyester fiberfill
- Needle: Yarn needle for assembly
- Scissors: Sharp pair for cutting yarn
- Buttons: Two small orange for overalls
- Felt: White and red for details
Abbreviations and Techniques:
- MR: Magic Ring
- Ch: Chain
- Sc: Single Crochet
- Inc: Increase (2 sc in one st)
- Dec: Invisible Decrease (decrease using front loops only)
- Sl st: Slip Stitch
- St(s): Stitch(es)
- BLO: Back Loop Only
- FO: Fasten Off
Head (using light skin-tone yarn):
- R1: MR 6 sc (6 sts)
- R2: Inc x6 (12 sts)
- R3: [Sc, inc] x6 (18 sts)
- R4: [Sc 2, inc] x6 (24 sts)
- R5: [Sc 3, inc] x6 (30 sts) … Continue this increasing sequence until…
- R12: [Sc 11, inc] x6 (72 sts)
- R13-R18: Sc around (72 sts)
- Insert safety eyes between R17 & R18, approximately 18 sts apart.
- Start decreasing, mirroring the increase pattern, until the head is closed.
Body (begin with blue yarn):
- R1: Ch 24, join to form a ring, ensuring not to twist the chain.
- R2-R10: Sc around (24 sts)
- R11: Switch to red yarn, sc around in BLO (24 sts)
- R12-R15: Sc around (24 sts)
- FO, leave a long tail for sewing.
Arms (make 2, with light skin-tone yarn):
- R1: MR 6 sc (6 sts)
- R2: [Sc, inc] x3 (9 sts)
- R3-R12: Sc around (9 sts)
- Switch to white yarn for the gloves.
- R13-R16: Sc around (9 sts)
- Stuff lightly, FO, leave a long tail for sewing.
Legs and Feet (continue, starting with brown yarn for shoes):
Shoes (make 2):
- R1: Start with brown yarn, MR with 6 sc (6 sts)
- R2: Inc in each st around (12 sts)
- R3: [Sc, inc] x6 (18 sts)
- R4-R5: Sc around (18 sts)
- R6: [Sc 2, inc] x6 (24 sts)
- R7: Sc around in BLO (24 sts)
- R8-R9: Sc around (24 sts)
- Change to blue yarn for the pants.
- R10: Sc around in BLO (24 sts)
- R11-R25: Sc around (24 sts)
- Stuff firmly, FO, leaving a long tail for sewing.
Assembly of Legs to Body:
- Position the legs against the bottom of the body where the back loops were left and sew securely, making sure they’re symmetrical and stable.
Hat (with red yarn):
- R1: MR 6 sc (6 sts)
- R2: Inc in each st around (12 sts)
- R3: [Sc, inc] x6 (18 sts)
- R4: [Sc 2, inc] x6 (24 sts) … Continue the increasing pattern until the hat fits the head circumference.
- R11: [Sc 10, inc] x6 (72 sts)
- R12-R15: Sc around (72 sts)
- Add a piece of cardboard or plastic inside the hat to keep the brim flat.
- FO, leave a long tail for attaching to the head.
Mustache and Facial Features:
- With black yarn, embroider the mustache directly below the safety eyes.
- Using white yarn, embroider the eyes to give them a more defined look if desired.
- Create eyebrows with small stitches of black yarn above the eyes.
Decorative Details:
- Cut out a small circle of white felt, and another smaller circle of red felt.
- Embroider a letter “M” onto the red felt.
- Glue or sew the red felt onto the white, then attach it to the front center of the hat.
Finishing Touches:
- Sew the head to the body with the yarn tail.
- Attach the arms to either side of the body, just below the neckline.
- Sew the orange buttons onto the front of the body to resemble overalls.
- Use any additional embroidery or felt to add details such as logos or pockets to the overalls.
This amigurumi project will require attention to detail and careful assembly, but the end result should be a charming and sturdy little character. Remember to take your time with each piece, and don’t hesitate to personalize further where you see fit. Enjoy your crocheting!