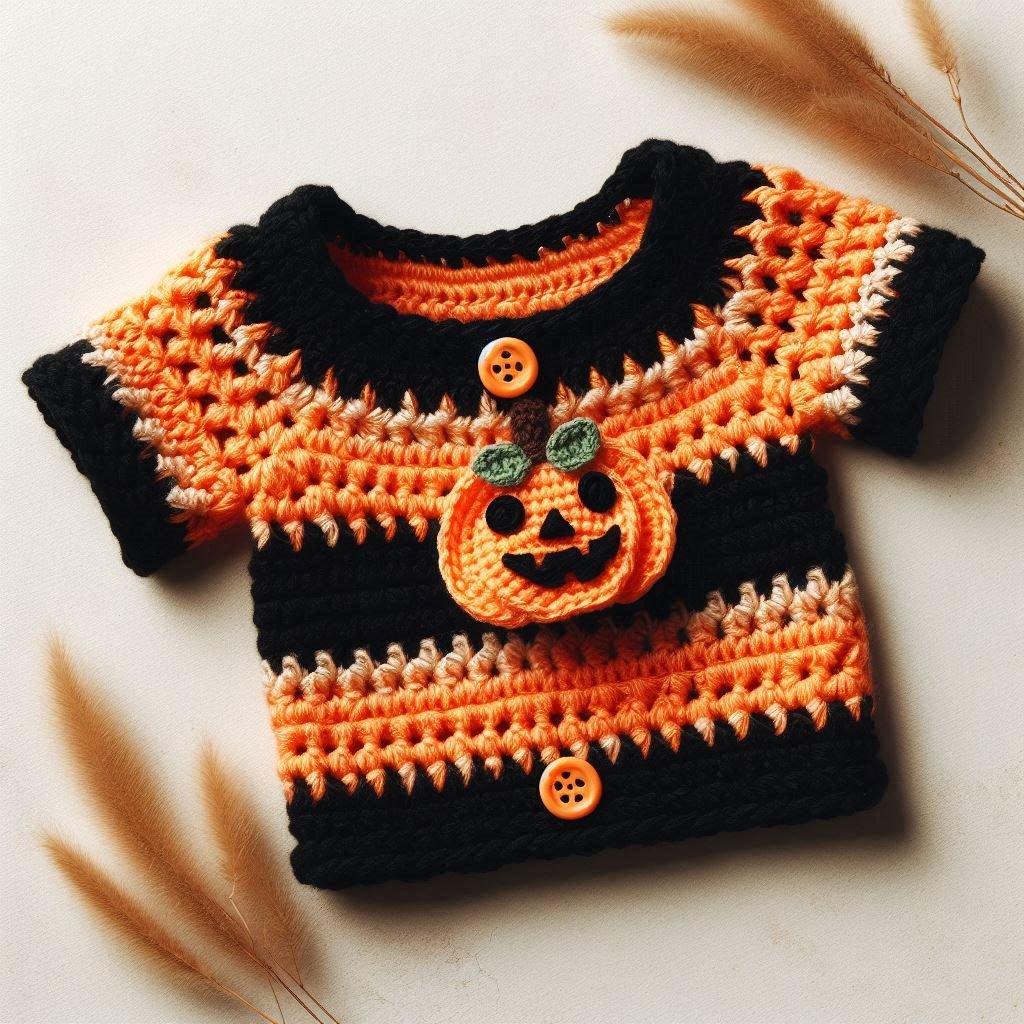
This adorable pumpkin crocheted baby sweater is perfect for celebrating Halloween or adding a festive touch to your baby’s fall wardrobe. Featuring vibrant orange and black stripes, cute pumpkin appliqué, and bright orange buttons, this sweater is both cozy and stylish. Whether for a Halloween party or a seasonal outing, your baby will look charming and stay warm in this delightful sweater.
Adorable Pumpkin Crocheted Baby Sweater
Creating this pumpkin-themed crocheted baby sweater is a fun and rewarding project. The pattern is detailed, making it suitable for intermediate crocheters. Follow the step-by-step instructions below to craft this beautiful and comfortable baby sweater.
Here is a detailed crochet pattern to create your own adorable pumpkin baby sweater. This guide includes the necessary materials and step-by-step instructions to ensure a charming design and a comfortable fit for your baby.
Materials:
Yarn: Soft acrylic yarn in orange, black, and green (DK weight recommended)
Crochet hook: Size appropriate for your yarn (typically 4 mm – 5 mm)
Scissors
Yarn needle
Buttons for closure and decoration
Tape measure
Abbreviations:
ch: chain
sc: single crochet
hdc: half double crochet
dc: double crochet
sl st: slip stitch
inc: increase (2 stitches in one stitch)
dec: decrease (2 stitches together)
Pattern:
Body:
Front and Back Panels (make 2):
With orange yarn, ch 41.
R1: Dc in 4th ch from hook and across (total 38 dc). Turn.
R2-14: Ch 3 (counts as dc), dc in each st across. Turn.
Fasten off and weave in ends.
Sleeves:
Make 2:
With black yarn, ch 24.
R1: Dc in 4th ch from hook and across (total 21 dc). Turn.
R2-8: Ch 3 (counts as dc), dc in each st across. Turn.
Fasten off and weave in ends.
Assembly:
Join Front and Back Panels:
Align the front and back panels and sew shoulder seams together.
Attach sleeves to the armholes and sew in place.
Sew side seams and sleeve seams together.
Collar:
With black yarn, join at the neckline:
R1: Ch 1, sc evenly around the neckline, join with sl st.
R2: Ch 3 (counts as dc), dc in each st around, join with sl st.
R3: Ch 1, sc in each st around, join with sl st.
Fasten off and weave in ends.
Decorative Trim:
With black yarn, join at the bottom edge of the sweater:
R1: Ch 1, sc evenly around the bottom edge, join with sl st.
R2: Ch 3 (counts as dc), dc in each st around, join with sl st.
Fasten off and weave in ends.
Pumpkin Face Appliqué:
Pumpkin:
With orange yarn, make a magic ring.
R1: Ch 1, 6 sc in ring, join with sl st.
R2: Ch 1, 2 sc in each st around (total 12 sc). Join with sl st.
R3: Ch 1, (sc, 2 sc in next st) around (total 18 sc). Join with sl st.
Fasten off, leaving a long tail for sewing.
Leaves (make 2):
With green yarn, ch 6.
R1: Sc in 2nd ch from hook, hdc in next ch, dc in next ch, hdc in next ch, sc in last ch. Fasten off, leaving a long tail for sewing.
Face Details:
Use black yarn to create triangle eyes, a nose, and a smile.
Sew the face details onto the pumpkin.
Assembly:
Sew the pumpkin appliqué to the front of the sweater.
Sew the leaves to the top side of the pumpkin.
Finishing Touches:
Sew buttons to the front of the sweater for closure.
Add any additional decorative elements, such as a small bow.