Creating a “Grinch Amigurumi” is a delightful and creative crochet project, especially popular during the holiday season. This project is perfect for fans of the classic Dr. Seuss story “How the Grinch Stole Christmas!” as well as those who enjoy whimsical and character-based crochet work. The Grinch, with his mischievous yet endearing personality, makes for a unique and captivating amigurumi character.
The design of the Grinch Amigurumi typically captures his distinctive features: the green fur, the slightly grumpy expression softened by a hint of playfulness, and perhaps his red Santa-like outfit, depending on which version of the Grinch you wish to portray. Attention to detail is key in recreating his characteristic facial expressions and outfit. The project not only brings joy to those who love the story but also adds a touch of whimsy to holiday decorations.
For crafters interested in making their own Grinch Amigurumi, a detailed pattern is essential. The pattern should guide through the process of creating the Grinch’s body, his iconic facial features, and his clothing, if included. It’s important for the pattern to be clear and detailed, ensuring that each aspect of the Grinch’s appearance is accurately represented. The instructions should cater to a variety of skill levels, allowing both beginners and experienced crocheters to enjoy the process of bringing this beloved character to life. To begin your journey in crafting this iconic character, please refer to the pattern provided below.
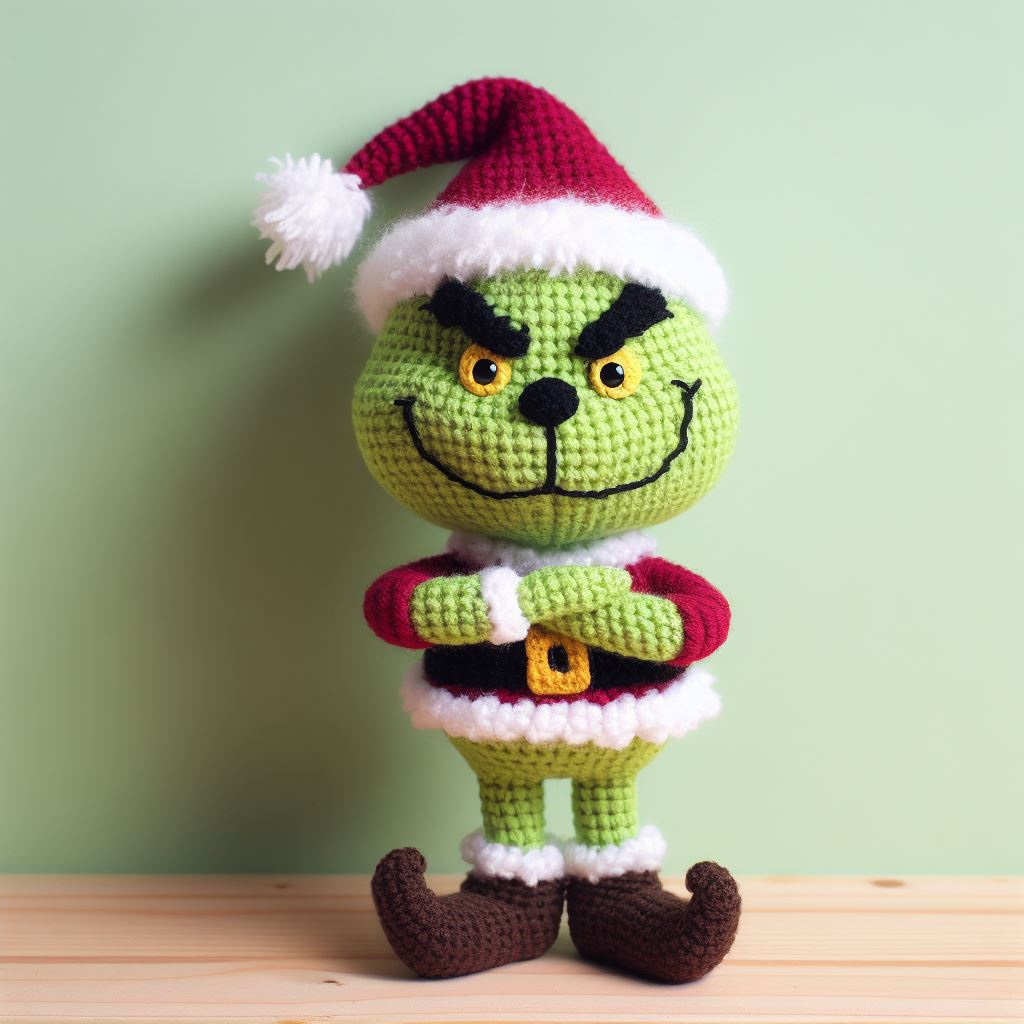
Materials Needed:
- Green, red, white, black, yellow, and brown medium weight yarn
- Crochet hook (size 3.5mm or appropriate for yarn weight)
- Fiberfill for stuffing
- Yarn needle for sewing pieces together
- Stitch markers to mark rounds
- Safety eyes (9mm) or black yarn for embroidery
- Scissors
Abbreviations:
- ch: chain
- sc: single crochet
- hdc: half double crochet
- dc: double crochet
- inc: increase (2 sc in one stitch)
- dec: decrease (sc 2 together)
- sl st: slip stitch
- BLO: back loops only
- FLO: front loops only
- st(s): stitch(es)
- rnd(s): round(s)
- []: repeat instructions within brackets as directed
Head (with Green Yarn):
- Begin with a magic ring.
- Rnd 1: 6 sc in ring (6 sts).
- Rnd 2: [Inc] x6 (12 sts).
- Rnd 3: [Sc, inc] x6 (18 sts).
- Continue increasing in this pattern (sc in next 2 sts, inc in next st) until you reach (sc in next 7 sts, inc in next st) for a total of 48 sts.
- Rnds 18-25: Sc in each st around (48 sts).
- Insert safety eyes between Rnds 18-19, 8 sts apart.
- Rnds 26-30: Begin to dec for the head, reversing the increase pattern.
- Stuff firmly with fiberfill.
- Close the head and fasten off.
Body (Continued with Green Yarn):
- Continue from the head without fastening off.
- Rnds 31-45: Sc in each st around (48 sts).
- Rnds 46-47: Switch to white yarn, sc in BLO for the fur trim.
- Rnds 48-53: Switch back to green, sc in each st around.
- Rnds 54-57: Begin dec to shape the body.
- Fasten off and leave a long tail for sewing.
Hat (Red and White Yarn):
- With white yarn, ch enough to fit around the head, join to form a ring.
- Rnd 1: Sc in each ch around, sl st to join.
- Switch to red yarn for the body of the hat.
- Rnds 2-12: Sc in each st around, sl st to join.
- Rnds 13-15: Dec every 5 sts to form the tapering shape of the hat.
- Finish with a white pompom made from yarn and attach to the tip.
Arms (Green Yarn, make 2):
- Begin with a magic ring.
- Rnd 1: 6 sc in ring (6 sts).
- Rnds 2-18: Sc in each st around (6 sts).
- Change to white yarn, sc for 2 rnds for the trim.
- Stuff lightly and sew to the sides of the body.
Legs and Boots (Brown and Green Yarn, make 2):
- Start with brown yarn for the boots.
- Begin with a magic ring.
- Rnd 1: 6 sc in ring (6 sts).
- Inc each rnd until you have 18 sts, then sc straight for boot height.
- Change to green yarn for the legs.
- Rnd 2: Inc in the first st of the rnd to give a ‘puffy pants’ look.
- Rnds 3-12: Sc in each st around (19 sts).
- Stuff and sew to the bottom of the body.
Face Details:
- Embroider eyebrows and a mouth with black yarn.
- Use yellow yarn to crochet small patches and sew around the safety eyes for extra detail.
Belt (Black and Yellow Yarn):
- With black yarn, ch enough to fit around the body’s circumference, join with a sl st.
- Rnd 1: Sc in each ch around, sl st to join.
- For the belt buckle, create a small square with yellow yarn and attach it to the center of the belt.
Assembly:
- Attach the head to the body.
- Sew on the arms evenly on each side.
- Position the hat on the head, tilting to one side as desired.
- Embroider additional facial details or any other character-specific features.
Remember to count your stitches and rounds for symmetry. This pattern is adjustable; you can modify the number of rounds or stitches to make your amigurumi larger or smaller. Keep a consistent tension for the best results. Enjoy crafting your amigurumi character!