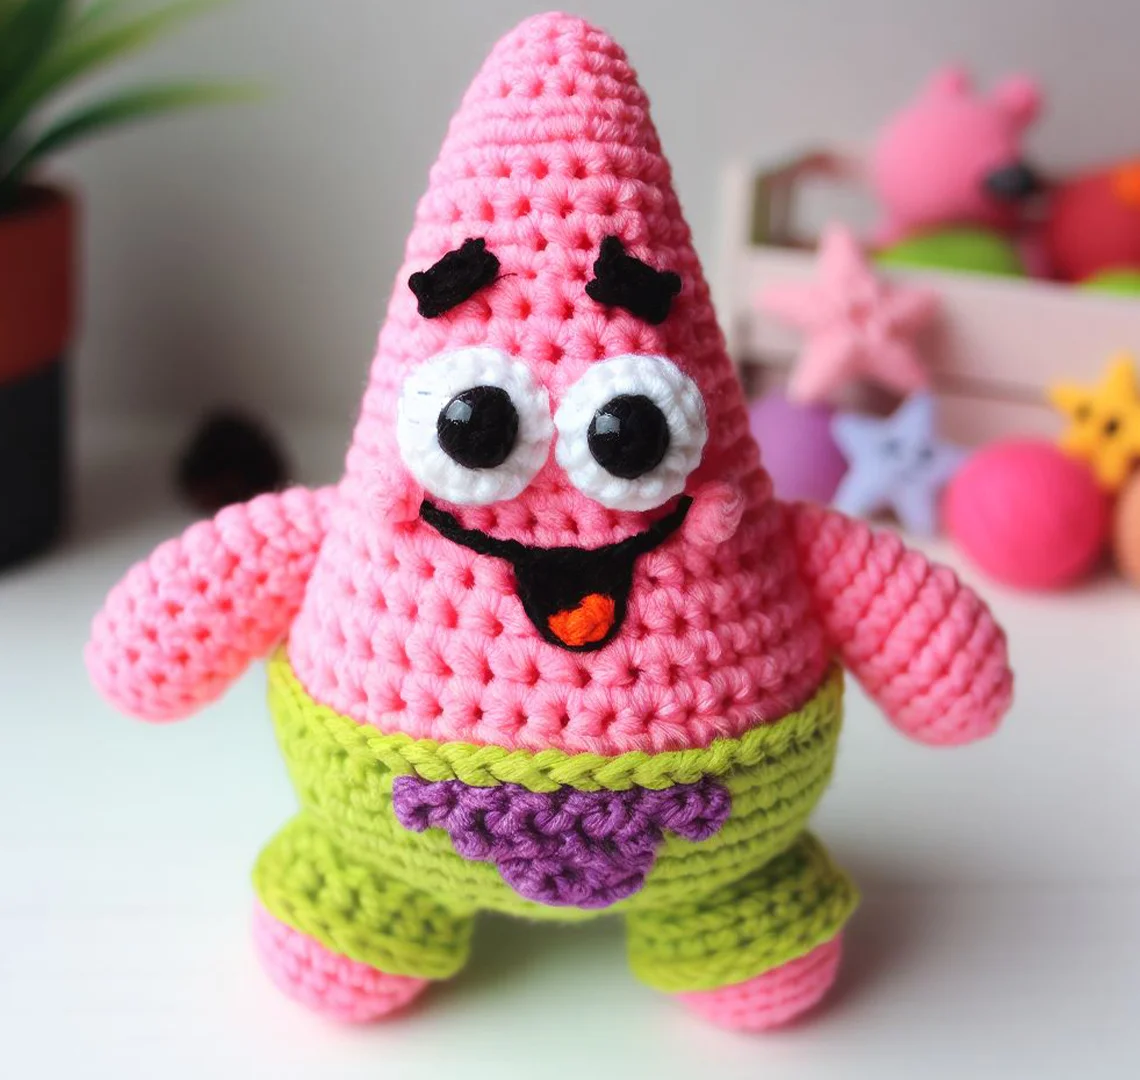
Tucked away in the crafty corners of the crochet world, a whimsical creation is bringing a smile to fans of the sea’s most lovable starfish, Patrick Star. This amigurumi, a Japanese art of knitting or crocheting small, stuffed yarn creatures, captures the essence of the bubbly character from the deep blue. With his signature pink hue and goofy grin, the Patrick Star amigurumi is a hit among crafters and “SpongeBob SquarePants” enthusiasts alike. Each stitch and loop intertwines to bring to life his cartoonish charm, making it a perfect companion for children and a nostalgic keepsake for adults who grew up with the underwater antics of Bikini Bottom.
Crafting a Patrick Star amigurumi is a delightful dive into the artistry of crochet. The design thoughtfully includes his distinctive green and purple floral shorts, and pays particular attention to his expressive eyes, ensuring that each handmade Patrick is as endearing as the character on screen. Whether he’s sitting on a shelf or tagging along on daily adventures, this amigurumi creation is robust enough for play and adorable enough to warm the hearts of any onlooker. It’s an opportunity for crafters to challenge their skills and for fans to hold a piece of their cherished childhood in the palm of their hands.
For those who have been charmed by Patrick’s goofy demeanor and are eager to recreate this amigurumi masterpiece, the crochet pattern is your gateway. Below, you’ll find the pattern that will guide you through each step, from the magical loop to the final stitch, ensuring that your Patrick Star will come to life with all the joy and silliness he embodies. Grab your crochet hooks and prepare your favorite yarn, because it’s time to create a little piece of Bikini Bottom magic right in your own home. The pattern for the crochet awaits you below.
Materials:
- Yarn: Medium weight [#4] – pink, light green, purple, black, white, and orange for the tongue.
- Crochet hook: Size E/4 (3.50 mm) or suitable for tight stitches.
- Fiberfill stuffing.
- Yarn needle.
- Safety eyes: 9 mm or embroidered with black yarn.
- Stitch markers.
Abbreviations:
- mc: magic circle
- sc: single crochet
- inc: increase (2 sc in one stitch)
- dec: invisible decrease (insert hook into front loop of next 2 stitches and crochet them together)
- sl st: slip stitch
- st(s): stitch(es)
- rnd(s): round(s)
- [ ]: repeat instructions within brackets for the number of times specified
- BLO: back loop only
Body (Use Pink Yarn):
- Begin with mc, 6 sc in mc (6 sts).
- Rnd 2: [Inc in each st] around (12 sts).
- Rnd 3: [Sc, inc] around (18 sts).
- Rnd 4: [Sc in next 2 sts, inc] around (24 sts).
- Rnd 5: [Sc in next 3 sts, inc] around (30 sts).
- Rnd 6: [Sc in next 4 sts, inc] around (36 sts).
- Rnd 7: [Sc in next 5 sts, inc] around (42 sts).
- Rnd 8: [Sc in next 6 sts, inc] around (48 sts). 9-20. Rnd 9-20: Sc around (48 sts in each rnd).
- Rnd 21: [Sc in next 6 sts, dec] around (42 sts).
- Rnd 22: Sc around (42 sts).
- Rnd 23: [Sc in next 5 sts, dec] around (36 sts).
- Rnd 24: Sc around (36 sts).
- Rnd 25: [Sc in next 4 sts, dec] around (30 sts).
- Rnd 26: [Sc in next 3 sts, dec] around (24 sts).
- Rnd 27: [Sc in next 2 sts, dec] around (18 sts).
- Rnd 28: [Sc, dec] around (12 sts).
- Rnd 29: [Dec] around (6 sts).
- Fasten off and leave a long tail for sewing. Stuff the body.
Shorts (Use Light Green and Purple Yarn):
- Follow Rnds 1-7 from the body pattern for the base of the shorts.
- Rnd 8-10: Sc in each st around in light green (42 sts).
- Rnd 11: In BLO, sc around to create a fold line for the shorts (42 sts).
- Rnd 12-14: Continue in sc around in light green (42 sts).
- Rnd 15: Switch to purple yarn and work in floral pattern details with surface slip stitches or embroider them on.
Arms (Make 2 with Pink Yarn):
- Start with mc, 6 sc in mc (6 sts).
- Rnd 2: [Inc] around (12 sts). 3-8. Rnd 3-8: Sc around (12 sts in each rnd).
- Fasten off, leaving a tail for sewing. Stuff lightly.
Tongue (Use Orange Yarn):
- Ch 2, 4 sc in second ch from hook, turn.
- Rnd 2: [Inc] across (8 sts).
- Rnd 3: [Sc, inc] across (12 sts).
- Rnd 4: Sc around (12 sts).
- Fasten off, leaving a tail for sewing.
Eyes (Make 2 with White and Black Yarn):
- With white yarn, start with mc, 6 sc in mc (6 sts).
- Rnd 2: [Inc] around (12 sts).
- Fasten off, leaving a tail for sewing.
- With black yarn, create a small circle or oval for the pupil or embroider directly onto the white part.
Mouth and Eyebrows (Black Yarn):
- Embroider the eyebrows directly onto the body with black yarn.
- For the mouth, create a wide “W” shape and fill it in with black yarn.
Assembly:
- Sew the shorts onto the body where the color changes from pink to green.
- Attach the arms on each side at the top of the shorts.
- Sew on the eyes above the mouth, making sure they are symmetrical.
- Embroider the mouth below where the nose would be, and add the tongue centered below the mouth, with the tongue sticking out slightly.
- Attach the eyebrows above the eyes.
Adjust the facial features to match the image as closely as possible. This pattern is more detailed and tailored to the amigurumi’s characteristics. When working on the facial features, take your time to ensure their correct placement for the best result.