Amigurumi is a Japanese art form of creating small, stuffed crochet or knitted creatures that has gained worldwide popularity. These adorable yarn creations have taken on various forms, from animals to fantasy characters, and even video game icons. One such beloved character brought to life in amigurumi form is none other than Sonic the Hedgehog. In this article, we will explore the world of Sonic amigurumi, its appeal, and how you can make your very own Sonic amigurumi.
Sonic the Hedgehog: A Pop Culture Icon:
Sonic the Hedgehog is an iconic character created by Sega in the early 1990s. He’s known for his supersonic speed and his mission to stop the evil Dr. Robotnik (also known as Dr. Eggman) from taking over the world. Sonic quickly became a pop culture sensation, starring in numerous video games, TV series, and even a feature film.
The Appeal of Sonic Amigurumi: Sonic amigurumi has gained a special place in the hearts of both amigurumi enthusiasts and Sonic fans. These miniature crocheted or knitted versions of the blue hedgehog capture the essence of the character in a charming and huggable form. Here are some reasons why Sonic amigurumi is so appealing:
- Nostalgia: Sonic has a dedicated fan base that grew up playing his games. Creating and owning a Sonic amigurumi can evoke feelings of nostalgia and fond memories of the early days of gaming.
- Collectibility: Amigurumi collectors are always on the lookout for unique and well-crafted pieces. Sonic amigurumi creations, often handmade with care and attention to detail, have become sought-after collectibles.
- Handmade Charm: Amigurumi, by its nature, is a craft that emphasizes handmade and personalized creations. Each Sonic amigurumi is a unique work of art, adding to its appeal.
- Craftsmanship: Crafting Sonic in amigurumi form requires skill and creativity. Crafters enjoy the challenge of translating a well-known character into a new medium.
Making Your Own Sonic Amigurumi:
Creating your own Sonic amigurumi can be a rewarding and fun project. Here’s a basic guide to get you started:
Materials:
- Medium weight yarn in blue, beige, white, black, green, red, and yellow
- Size 3.5mm crochet hook
- Fiberfill for stuffing
- Stitch markers
- Yarn needle
- Safety eyes or black felt
- Pipe cleaners or wire for poseable limbs
Abbreviations:
- ch: chain
- sc: single crochet
- hdc: half double crochet
- dc: double crochet
- tr: treble crochet
- sl st: slip stitch
- inc: increase (2 sc in the same stitch)
- dec: decrease (sc 2 together)
- BLO: back loop only
- FLO: front loop only
- st(s): stitch(es)
Head (Blue and Beige Yarn):
- Start with blue yarn.
- R1: Create a magic ring, 6 sc into the ring (6 sts)
- R2: Inc in each st around (12 sts)
- R3: Sc, inc around (18 sts)
- R4: Sc 2, inc around (24 sts)
- … Continue the increase pattern until you have 48 sts.
- R9-R15: Sc in each st around for 7 rounds (48 sts)
- Start adding beige yarn to create the face. Introduce color changes where necessary to match the image.
- Begin to dec while continuing color pattern to shape the face and back of the head.
- Stuff head before fully closing.
Eyes (White, Green, and Black Yarn):
- With white yarn.
- R1: Magic ring, 6 sc into the ring (6 sts)
- R2: Inc in each st around (12 sts)
- R3: Sc, inc around (18 sts)
- Flat piece, change to green yarn to create the colored part of the eyes and embroider with black for the pupils.
- Attach eyes to the head between the blue and beige yarn color change.
Ears (Blue and Beige Yarn, Make 2):
- With blue yarn.
- R1: Magic ring, 6 sc into the ring (6 sts)
- R2-R4: Sc in each st around for 3 rounds (6 sts)
- Flatten the piece, switch to beige yarn, and sc around the edge to create the inner ear color.
Body (Blue and Beige Yarn):
- Start with blue yarn.
- Follow a similar pattern to the head for the upper body until approximately half the diameter of the head.
- Switch to beige yarn for the belly.
- R1-R5: Sc in each st around (follow the same stitch count as the last round of the head).
- Begin to dec for the lower body and close after fully stuffing.
Arms (Blue and White Yarn, Make 2):
- With blue yarn.
- R1: Magic ring, 6 sc into the ring (6 sts)
- R2-R10: Sc in each st around for 9 rounds (6 sts)
- Switch to white yarn for gloves.
- R11-R13: Inc around to widen for the gloves (12 sts)
- R14-R20: Sc in each st around for gloves (12 sts)
- Stuff lightly and sew onto the body.
Legs (Blue, White, and Red Yarn, Make 2):
- With blue yarn for the legs.
- R1-R10: Sc in each st around (6 sts)
- Switch to white for the socks.
- R11-R13: Sc in each st around (6 sts)
- Change to red for the shoes.
- R14-R16: Inc around to form the shoes (12 sts)
- R17-R20: Sc in each st around (12 sts)
- Finish off with a yellow strip for the buckle.
- Stuff and attach to the body.
Shoes Detail (Yellow Yarn):
- Chain a length that fits around the shoe.
- Hdc in each ch, sl st to join.
- Sew onto the red part of each shoe.
Spikes (Blue Yarn, Make Several):
- With blue yarn.
- R1: Magic ring, 6 sc into ring (6 sts)
- R2: Sc, inc around (9 sts)
- R3: Sc 2, inc around (12 sts)
- Continue increasing in each round until you reach the desired length.
- Sew onto the head in the appropriate spiky pattern of Sonic’s hair.
Assembly:
- Sew all parts together securely using a yarn needle.
- For added detail, use black yarn to embroider Sonic’s nose and mouth.
- Insert pipe cleaners or wire for poseability before attaching limbs if desired.
Notes:
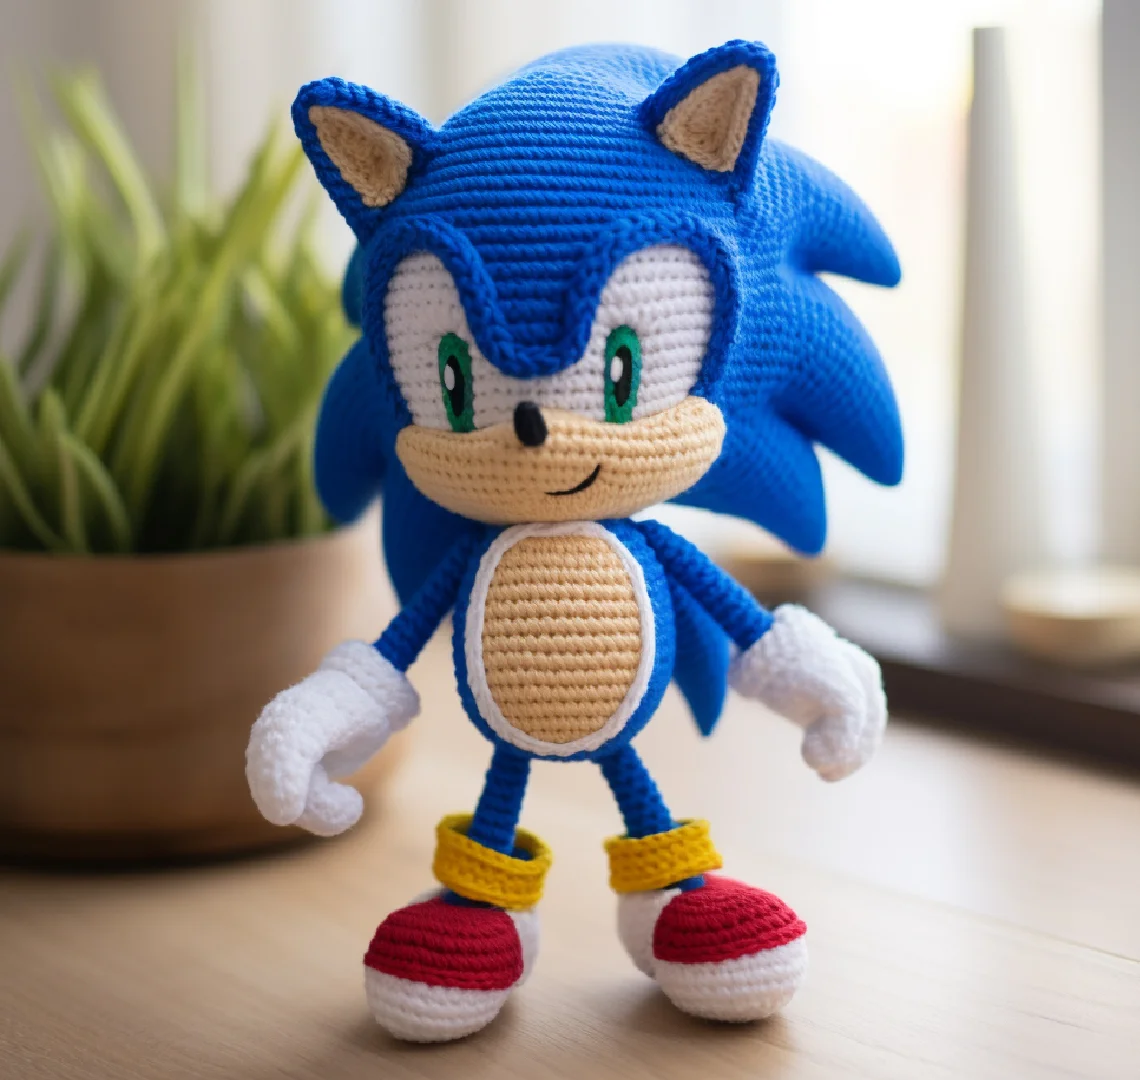
- Make sure to have a reference image of Sonic to assist with color placement and proportions.
- Always mark the beginning of your round with a stitch marker.
- Adjust the pattern as needed for size and proportion, especially if your gauge differs.
This pattern is a starting point, and it may require adjustments to create a perfect replica of the Sonic amigurumi shown in the image. The instructions provided are meant for an experienced crocheter, as they assume knowledge of complex shaping and detailed colorwork.