As Halloween approaches, it’s time to elevate your nail game with spooky and stylish designs perfect for the fall season. Think dark hues like burgundy and black, combined with autumnal tones of burnt orange and forest green, to create a chic yet eerie vibe. From classic Halloween symbols like ghosts and pumpkins to subtle fall leaf patterns and glittery accents, there’s no shortage of ideas to make your nails stand out. Get ready to embrace the season with nails that are as festive as they are fashionable!
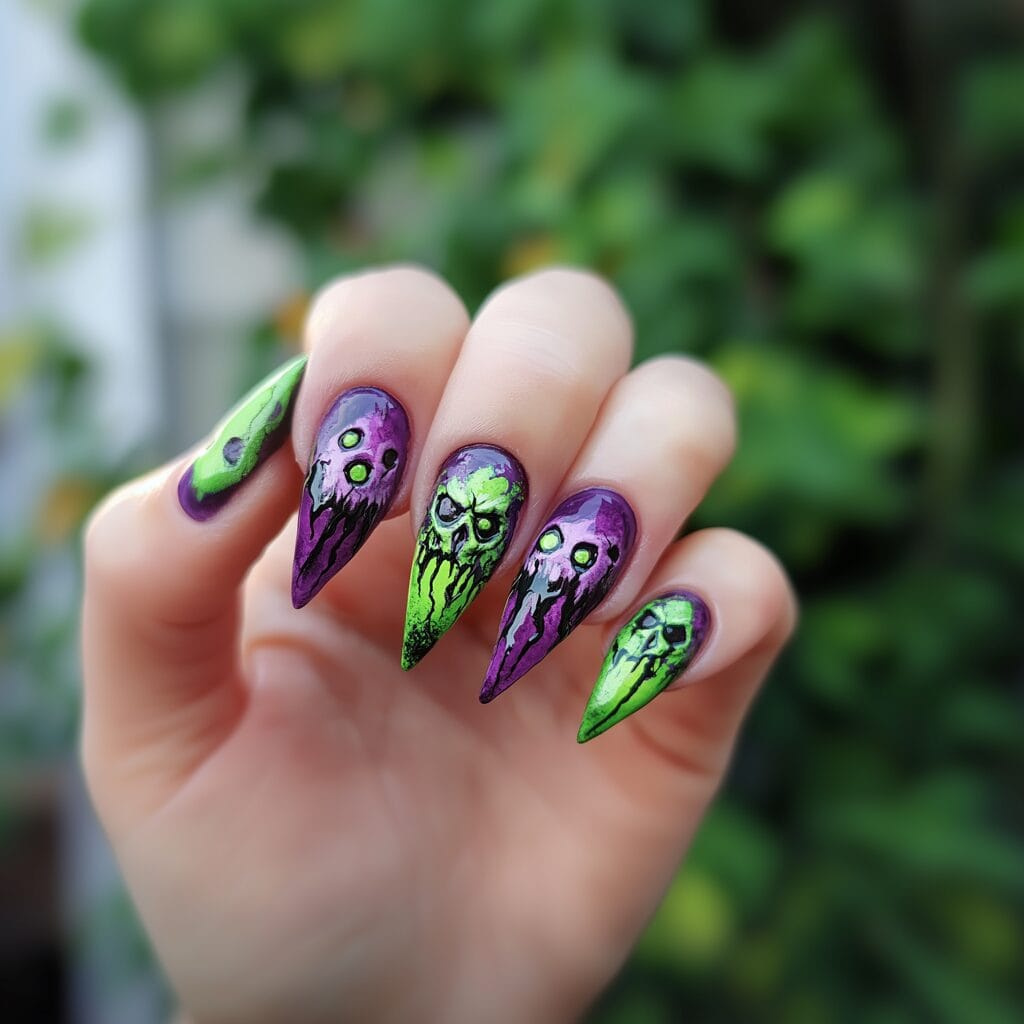
These bold Halloween-themed nails feature a spooky, dripping skull design in striking shades of neon green and purple. The pointed stiletto shape adds to the eerie effect, perfect for the season. This nail art is an eye-catching choice for anyone looking to embrace the Halloween spirit with a creative and edgy look.
Polish Colors and Materials Needed:
- Base coat
- Black nail polish
- Neon green nail polish
- Deep purple nail polish
- White nail polish (for skull detailing)
- Fine detailing brush
- Dotting tool (or a toothpick for smaller dots)
- Top coat
Step-by-Step Instructions:
Clean Up: Use a small brush dipped in nail polish remover to clean up any stray polish around your cuticles.
Prepare Your Nails: Start with clean, filed nails in a stiletto shape. Apply a thin layer of base coat to protect your nails and help the colors adhere better.
Apply the Base Colors: Paint each nail with two coats of deep purple polish, allowing each coat to dry completely. This will be the background for your zombie-inspired design.
Create the Skull Base: Using the neon green polish, paint irregular drips on each nail to resemble the outline of the skulls. You can use a fine detailing brush to achieve a more precise shape.
Add Skull Details: Once the neon green base is dry, use the white polish to paint two large eye sockets and smaller dots for any additional facial features. A dotting tool works well here for even circles.
Outline and Drip Effects: Using the black polish and a fine brush, outline the skull shapes and eye sockets. Add black drips to give the impression that the skulls are melting or oozing.
Final Touches: After the black details have dried, apply a top coat to seal in your design and add shine. Be careful not to smudge your artwork by allowing the nails to dry completely between layers.
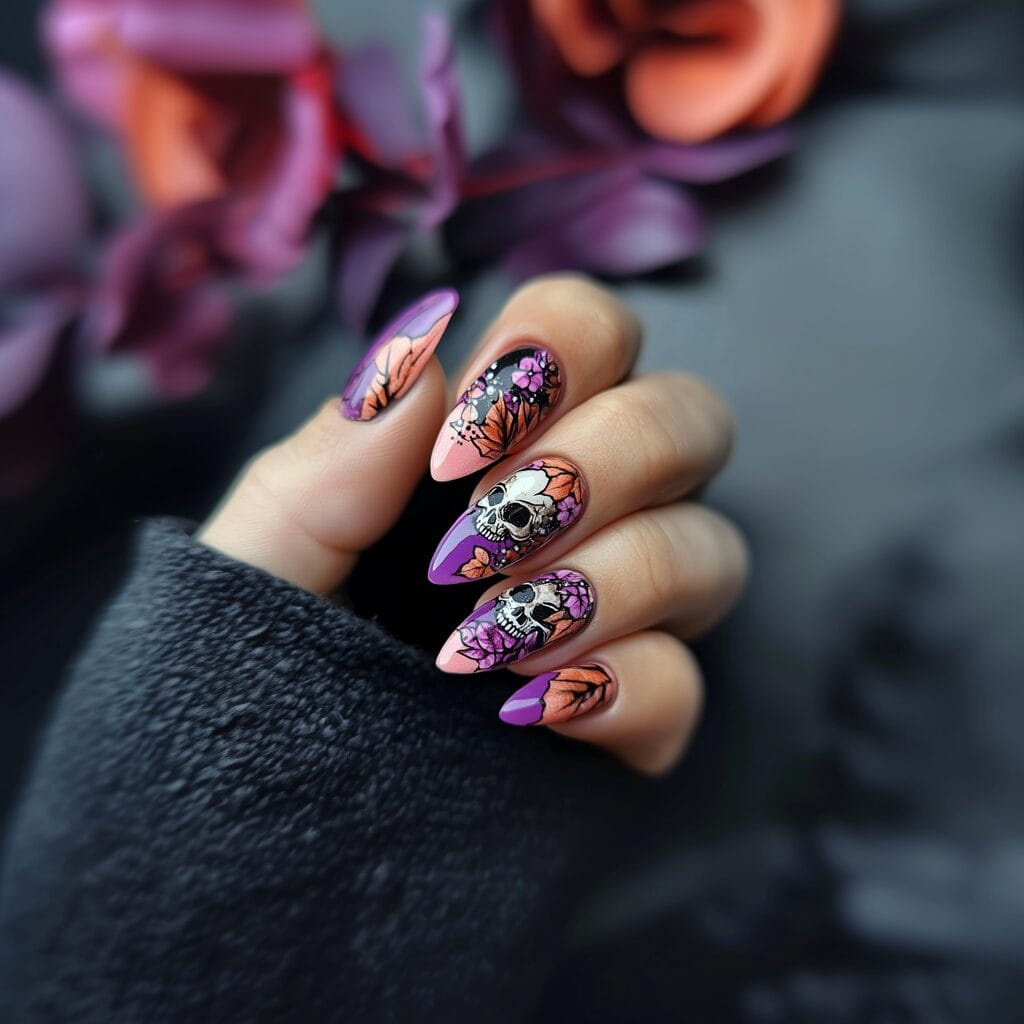
This Halloween nail art combines an elegant autumnal theme with a spooky touch, featuring skulls, floral designs, and vibrant colors. The look is achieved with shades of purple, peach, and black, accentuated with fine details that give a stylish yet haunting effect—perfect for the Halloween season.
Polish Colors and Materials Needed:
- Base coat
- Peach nail polish
- Purple nail polish
- Black nail polish (for outlining and details)
- White nail polish (for skull details)
- Orange or burnt orange nail polish (for fall leaves)
- Fine detailing brush
- Dotting tool or toothpick
- Top coat
Step-by-Step Instructions:
- Prepare Your Nails: Start with clean, filed nails in an almond shape. Apply a base coat to protect your nails and provide a smooth surface for the design.
- Apply the Base Colors: Paint each nail with two coats of alternating peach and purple polish. Allow each layer to dry completely before applying the next to prevent smudging.
- Create the Skull Design: Using white nail polish and a fine detailing brush, paint small skulls on the accent nails. Start with an oval shape for the skull, and add eye sockets, a nose, and teeth with black polish for details.
- Add Floral and Leaf Accents: Use the orange polish to paint fall leaves around the skulls on some nails. For the floral details, add small clusters of black flowers with tiny white dots in the centers, creating a delicate, intricate look. You can use a dotting tool for precise flower detailing.
- Outline and Detail: Use black polish and a fine brush to outline the skulls, leaves, and floral designs. Add thin lines to enhance the leaf veins and the flowers’ petal details.
- Final Touches: Once all designs are dry, apply a glossy top coat to seal in the artwork and add a beautiful shine. Make sure each nail is fully dry before applying the top coat to avoid smudging.
- Clean Up: Dip a small brush in nail polish remover and clean around the cuticles for a professional finish.
These nails are perfect for adding a chic yet spooky vibe to your Halloween look!
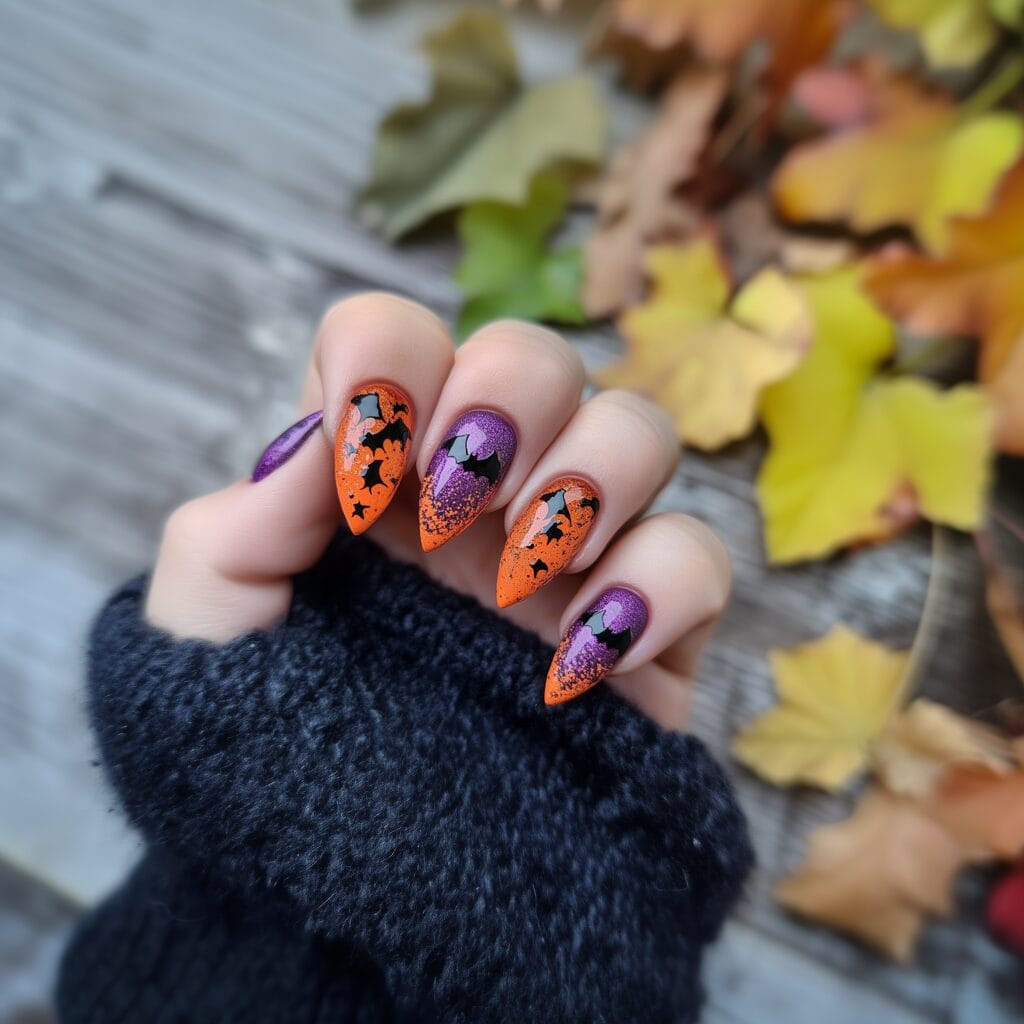
These Halloween nails are bold and fun, featuring a vibrant combination of orange and purple with a bat and star silhouette design. Perfect for the spooky season, the gradient effect and contrasting colors create a dramatic look that’s both festive and stylish for fall.
Polish Colors and Materials Needed:
- Base coat
- Bright orange nail polish
- Dark purple nail polish
- Black nail polish (for the silhouettes)
- Fine detailing brush or nail art stamping plate (for precise designs)
- Makeup sponge (for gradient effect)
- Top coat
Step-by-Step Instructions:
- Prepare Your Nails: Start with clean, shaped nails, and apply a base coat to protect your natural nails.
- Create the Gradient Base: Using a makeup sponge, apply a layer of orange polish on the bottom half and purple polish on the top half of the sponge. Dab the sponge onto each nail to create a smooth gradient. Repeat this step as needed, allowing each layer to dry between applications for a more intense color.
- Apply the Orange and Purple Polish: Once you have a nice gradient, use the orange polish to paint the bottom half of the nails. This helps intensify the color contrast with the purple at the top.
- Add Bat and Star Silhouettes: Use a fine detailing brush or a nail stamping plate to apply black bats, stars, and other spooky shapes over the gradient. You can place a few bats at the tips for a floating effect, and add stars to complete the Halloween theme.
- Seal and Shine: Apply a top coat once all the designs are dry to lock in the look and give it a glossy finish. Make sure each layer is dry to prevent smearing.
- Clean Up: Use a small brush dipped in nail polish remover to tidy up any polish around the cuticles.
These nails are perfect for Halloween parties and fall events, combining autumn colors with a spooky twist!
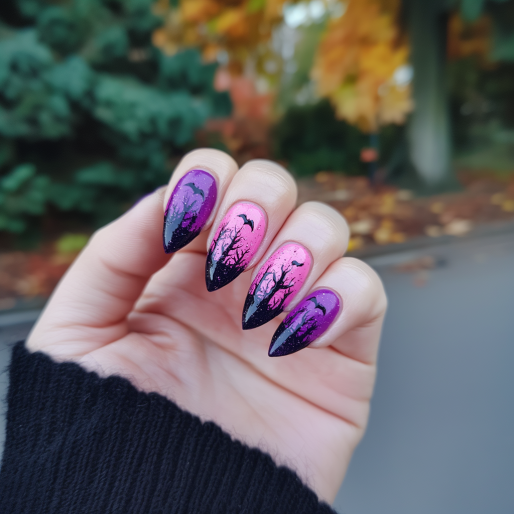
These nails are a hauntingly beautiful Halloween design with a sunset-inspired gradient in pink and purple, topped with black silhouettes of trees and bats. The gradient effect mimics an eerie twilight sky, while the spooky silhouettes add a mysterious and dramatic vibe, perfect for Halloween.
Polish Colors and Materials Needed:
- Base coat
- Pink nail polish
- Purple nail polish
- Black nail polish (for tree and bat silhouettes)
- Fine detailing brush or nail stamping plate
- Makeup sponge (for gradient effect)
- Top coat
Step-by-Step Instructions:
- Prepare Your Nails: Begin with clean, filed nails in a stiletto shape. Apply a base coat to protect your nails and ensure the colors adhere well.
- Create the Gradient Base: Apply pink and purple nail polish onto a makeup sponge, with the pink on the bottom half and the purple on the top. Dab the sponge onto your nails, blending the colors to create a smooth gradient. Repeat until the colors are vibrant, allowing each layer to dry before adding the next.
- Add Tree Silhouettes: Once the gradient base is dry, use black polish and a fine detailing brush to paint tree silhouettes, starting from the tip of each nail. Create irregular branches and varying tree heights for a natural, spooky forest look.
- Paint Bats: For added Halloween flair, use a dotting tool or fine brush to paint small bat shapes flying above the trees. To create a bat shape, start with a small black dot for the body, then add two curved wings on either side.
- Seal the Design: Apply a glossy top coat to seal in the artwork and give your nails a polished finish. Be sure each nail is completely dry before applying the top coat to avoid smudging.
- Clean Up: Use a small brush dipped in nail polish remover to tidy up the edges around your cuticles for a clean, professional look.
These nails capture the essence of a spooky, Halloween night with an artistic twist, perfect for embracing the season in style!
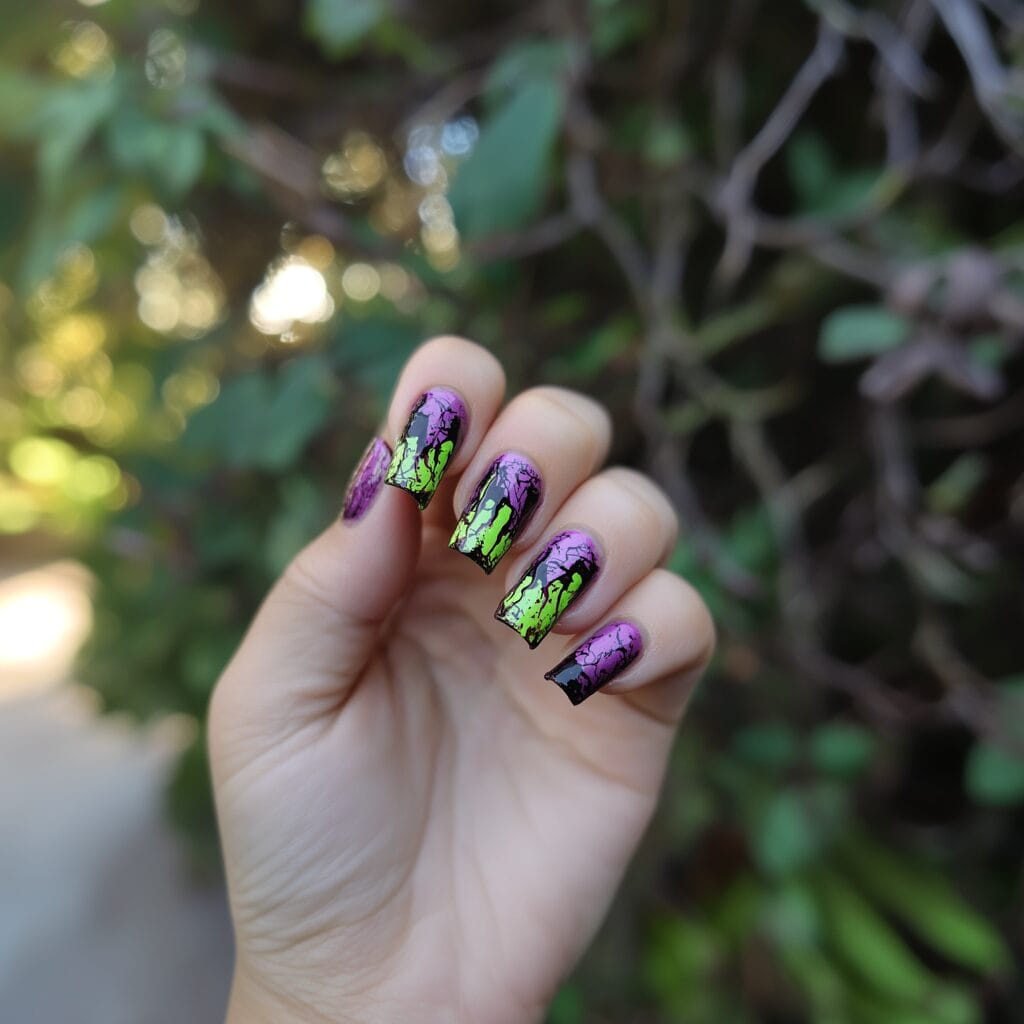
These edgy Halloween nails feature a dripping, slime-like design in neon green and purple over a dark base, giving them a creepy, zombie-inspired look. The effect is perfect for anyone looking to embrace a bold and spooky vibe this season.
Polish Colors and Materials Needed:
- Base coat
- Black nail polish
- Neon green nail polish
- Purple nail polish
- Fine detailing brush
- Top coat
Step-by-Step Instructions:
- Prepare Your Nails: Start with clean, filed nails and apply a base coat to protect your natural nails and help the polish adhere.
- Apply the Black Base Color: Paint each nail with two coats of black polish to create a dark background. Allow each coat to dry fully for a smooth finish.
- Add the Dripping Slime: Using a fine detailing brush, paint dripping slime shapes on each nail with neon green polish. Start at the top of the nail, creating irregular drip lines that extend downward. For an extra spooky effect, alternate with purple drips on some nails, mixing colors to create depth.
- Outline the Drips: Once the green and purple polish is dry, use the black polish and a fine brush to add outlines to the drips. This will enhance the slime effect and give the design more definition.
- Seal the Design: After the artwork is completely dry, apply a top coat to lock in the design and give it a glossy shine. Make sure to wait for each layer to dry to avoid smudging.
- Clean Up: Dip a small brush in nail polish remover and clean around the cuticles for a neat finish.
These nails are ideal for a Halloween party or simply adding a touch of spooky style to your look this season!
