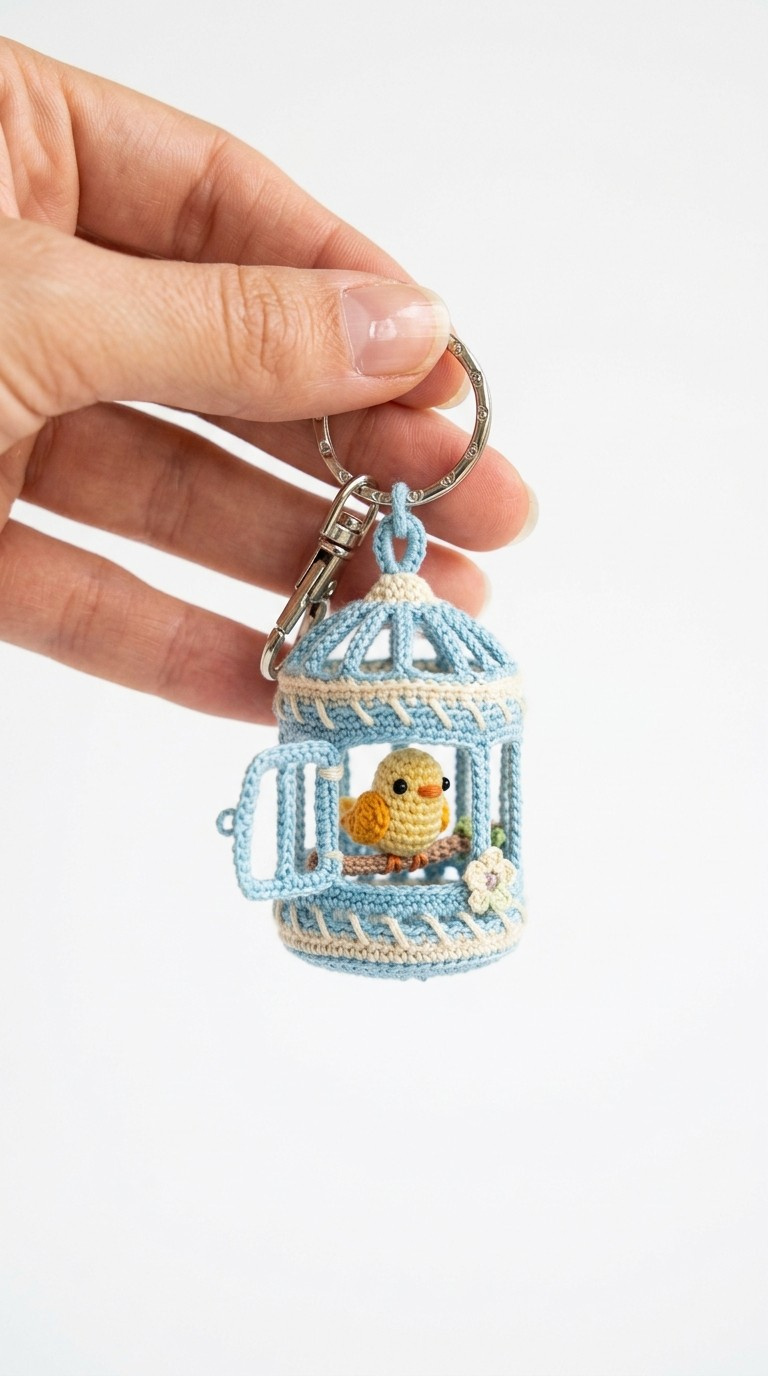
Carry a touch of whimsy wherever you go with this adorable Crochet Birdcage Keychain! Featuring a tiny, cheerful amigurumi bird nestled inside its very own miniature home, this project is a delightful way to add handmade charm to your keys or bag. It’s a perfect gift for bird lovers or a sweet treat for yourself.
Craft Your Own Tiny World: An Enchanting Birdcage Keychain
Unlock your creativity by crafting this unique birdcage keychain. The intricate details, from the delicate cage bars to the sweet little bird, come together to create a truly magical accessory. It’s a wonderful opportunity to practice your amigurumi skills and create a charming, personalized item that sparks joy.
Crochet Pattern: Charming Crochet Birdcage Keychain: Amigurumi Bird Free to Fly!
Materials
- Sport/DK weight cotton yarn in: Light Blue (main cage), Cream (cage trim, woven detail), Yellow (bird body), Orange (bird beak), Brown (perch), Black (eyes), Light Green (flower leaves), Light Pink (flower petals)
- 2.0mm crochet hook
- 3mm safety eyes
- Polyester fiberfill for stuffing
- Tapestry needle
- Stitch marker
- Scissors
- Keychain hardware (swivel clasp and split ring)
Abbreviations
- ch: chain
- sc: single crochet
- sl st: slip stitch
- inc: increase (2 sc in one stitch)
- dec: decrease (sc 2 together)
- FO: fasten off
- MR: magic ring
- FLO: front loop only
- BLO: back loop only
- st(s): stitch(es)
- rnd(s): round(s)
Instructions
Gauge: Not critical for this project, but aim for tight stitches to prevent stuffing from showing.
Note: Work in continuous rounds unless otherwise specified.
The Amigurumi Bird (Yellow & Orange)
Head/Body (Yellow):
- Rnd 1: 6 sc in MR. (6)
- Rnd 2: (inc) x6. (12)
- Rnd 3: (sc, inc) x6. (18)
- Rnd 4-7: sc in each st around. (18)
- Place 3mm safety eyes between Rnd 5 and 6, 4 stitches apart. Start stuffing firmly.
- Rnd 8: (sc, dec) x6. (12)
- Rnd 9: (dec) x6. (6)
- FO, leaving a long tail to close the hole and weave in.
Beak (Orange):
- Rnd 1: 3 sc in MR. (3)
- Rnd 2: sc in each st around. (3)
- FO, leaving a tail. Stitch to the bird’s face between the eyes.
Wings (Make 2 – Yellow):
- Rnd 1: 4 sc in MR. (4)
- Rnd 2: (sc, inc) x2. (6)
- FO, leaving a tail. Flatten and stitch to the sides of the bird’s body.
The Birdcage Base (Light Blue & Cream)
- Rnd 1 (Light Blue): 6 sc in MR. (6)
- Rnd 2: (inc) x6. (12)
- Rnd 3: (sc, inc) x6. (18)
- Rnd 4: (2 sc, inc) x6. (24)
- Rnd 5: (3 sc, inc) x6. (30)
- Rnd 6: (4 sc, inc) x6. (36)
- Rnd 7 (Cream): sc in BLO in each st around. (36)
- Rnd 8 (Light Blue): sc in each st around. (36)
- Sl st, FO.
The Birdcage Top (Light Blue & Cream)
- Rnd 1 (Light Blue): 6 sc in MR. (6)
- Rnd 2: (inc) x6. (12)
- Rnd 3: (sc, inc) x6. (18)
- Rnd 4: (2 sc, inc) x6. (24)
- Rnd 5: sc in each st around. (24)
- Rnd 6: (2 sc, dec) x6. (18)
- Rnd 7 (Cream): sc in BLO in each st around. (18)
- Rnd 8 (Light Blue): sc in each st around. (18)
- Sl st, FO.
Birdcage Vertical Bars (Light Blue – Make 8-10)
- Ch 15. Sc in 2nd ch from hook and in each ch across. (14 sc)
- FO, leaving long tails for attaching.
The Door (Light Blue)
- Ch 7.
- Row 1: Sc in 2nd ch from hook and in each ch across. Ch 1, turn. (6 sc)
- Row 2-5: Sc in each st across. Ch 1, turn. (6 sc)
- Row 6: Sc in each st across. (6 sc)
- FO, leaving a long tail for attaching.
The Perch (Brown)
- Ch 11.
- Row 1: Sc in 2nd ch from hook and in each ch across. (10 sc)
- FO, leaving long tails. Fold the strip in half lengthwise and stitch edges together to create a small tube, or leave flat.
Tiny Flowers (Light Green & Light Pink)
Flower (Make 2 – Light Pink):
- Rnd 1: 5 sc in MR. Sl st to first sc.
- *Ch 2, (dc, sl st) in next sc.* Repeat 5 times for 5 petals.
- FO, leaving a tail for attaching.
Leaves (Make 2 – Light Green):
- Ch 3. Sl st in 2nd ch from hook, sc in next ch.
- FO, leaving a tail for attaching.
Assembly
- Attach Vertical Bars: Using the long tails, evenly space and sew the light blue vertical bars between the Light Blue Rnd 8 of the Base and the Light Blue Rnd 8 of the Top.
- Add Horizontal Cream Accent: Take a long strand of Cream yarn and a tapestry needle. Starting at one side of the cage, weave the cream yarn horizontally through the vertical light blue bars, creating a criss-cross or woven pattern as desired, about halfway up the cage. Secure ends inside.
- Attach Door: Position the door between two vertical bars. Using the tail, sew one vertical edge of the door to one of the vertical bars, creating a hinge. You can add a tiny light blue loop (ch 3, sl st) on the other side of the door and a small light blue ch for a closure.
- Attach Perch: Secure the brown perch inside the cage by sewing its ends to two opposing vertical bars, at a height where the bird can sit.
- Place Bird: Sew or glue the amigurumi bird onto the perch.
- Attach Flowers: Sew the light pink flowers and light green leaves to the outside of the birdcage, near the bottom edge or the door, as pictured.
- Create Hanging Loop: Join Light Blue yarn to the center of the cage top (around Rnd 1 of the top piece). Ch 15, sl st into the same stitch or a nearby stitch to form a loop. FO, weave in ends.
- Attach Keychain Hardware: Thread the keychain swivel clasp through the crocheted hanging loop.