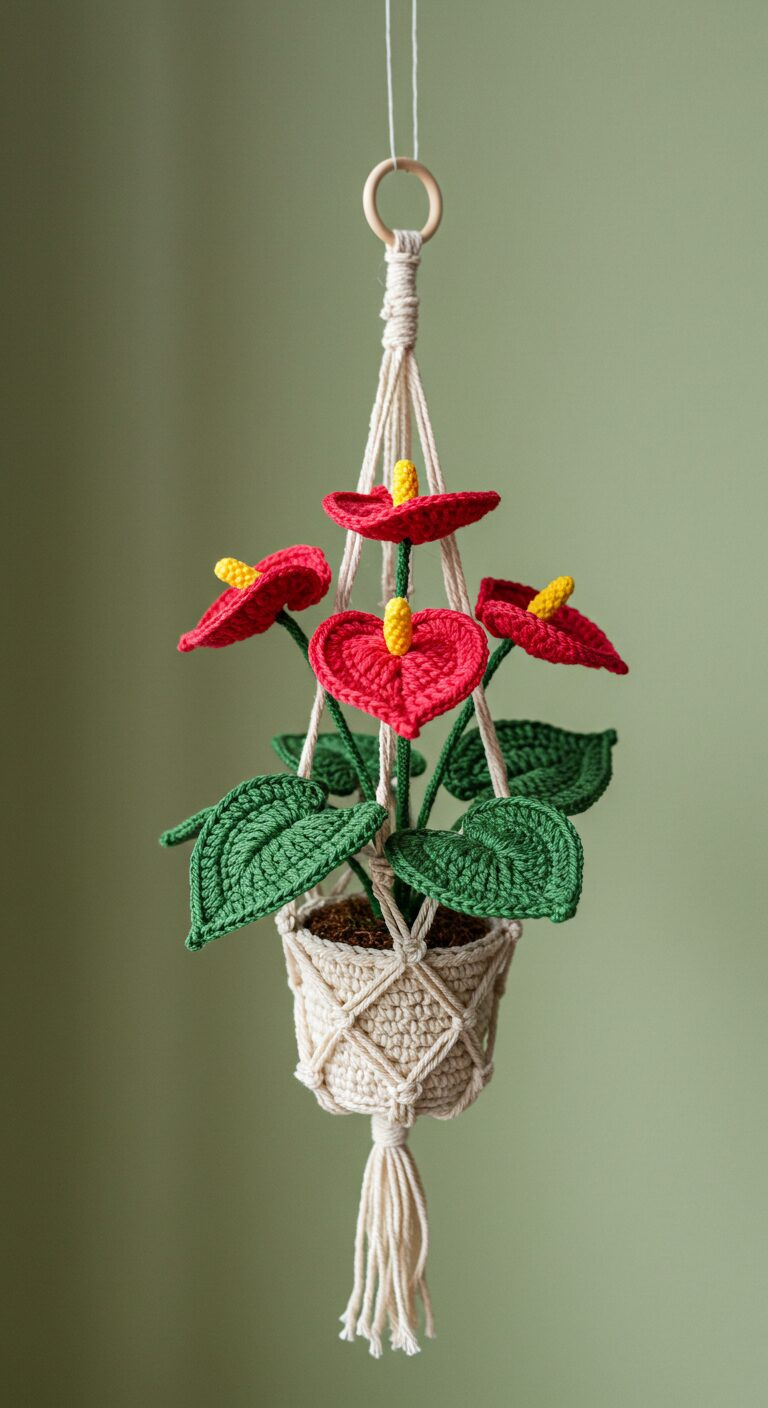
Bring the beauty of the tropics into your home with this stunning Crochet Anthurium Hanging Plant! Perfect for adding a touch of everlasting greenery and vibrant color to any space, this handmade piece is a joy to create and display.
Craft Your Own Everlasting Blooms
Whether you’re an experienced crocheter looking for a charming new project or a beginner eager to try amigurumi plants, this detailed guide will walk you through every step. You’ll learn how to create the distinctive heart-shaped anthurium flowers, vibrant green leaves, and even a lovely macrame-style hanging basket.
Materials You’ll Need:
- DK or Worsted weight yarn in: Red (for flowers), Bright Yellow (for spadix), Dark Green (for leaves and stems), Cream/Beige (for pot and hanger)
- Crochet hook (e.g., 2.5mm – 3.5mm, suitable for your yarn weight)
- Stuffing (polyester fiberfill or similar)
- Floral wire (gauge 20-24, for shaping stems – optional but recommended)
- Yarn needle
- Scissors
- Small wooden ring (approx. 1.5-2 inches diameter for hanger)
- Small amount of brown yarn or decorative moss (for ‘soil’)
Abbreviations:
- MR: Magic Ring
- ch: chain
- sc: single crochet
- inc: increase (2 sc in one stitch)
- dec: decrease (sc 2 stitches together)
- sl st: slip stitch
- dc: double crochet
- hdc: half double crochet
- BLO: Back Loop Only
- FO: Fasten off
- st(s): stitch(es)
- (…) x N: Repeat instructions in parentheses N times
- [N]: Total number of stitches in the round/row
Anthurium Flower (Make 4-5) – Red Yarn:
This forms the heart-shaped spathe.
- Ch 10.
- Row 1: Sc in 2nd ch from hook, sc in next 2 ch, hdc in next 2 ch, dc in next 3 ch, (2 dc, ch 2, 2 dc) in last ch (corner). Now work along the other side of the foundation chain: dc in next 3 ch, hdc in next 2 ch, sc in next 3 ch. Sl st to first sc to join. [22 sts + ch-2 space]
- Row 2: Ch 1, sc around, working (sc, ch 1, sc) in the ch-2 space at the top. Sl st to join. FO.
Anthurium Spadix (Make 4-5) – Yellow Yarn:
- Ch 8.
- Sc in 2nd ch from hook and in each ch across. [7 sc]
- FO, leaving a long tail for sewing.
Leaves (Make 5-7) – Dark Green Yarn:
These leaves have a subtle texture.
- Ch 12.
- Row 1: Sc in 2nd ch from hook, sc in next 3 ch, hdc in next 3 ch, dc in next 3 ch, (3 dc) in last ch (tip). Now work along the other side of the foundation chain: dc in next 3 ch, hdc in next 3 ch, sc in next 4 ch. Sl st to first sc to join. [26 sts]
- Row 2: Ch 1, sc in BLO around the entire leaf. Sl st to join. FO, leaving a long tail.
Stems (for Flowers & Leaves) – Dark Green Yarn & Floral Wire:
- Cut floral wire to desired stem length (approx. 4-6 inches for flowers, slightly shorter for leaves).
- Take a strand of green yarn and wrap it tightly around the floral wire. Secure ends with a dab of glue or by weaving in.
- Alternatively, ch to desired length, then sc down the chain, working over a piece of floral wire as you go to stiffen it.
The Pot (Cream/Beige Yarn):
- R1: 6 sc in MR [6]
- R2: (inc) x 6 [12]
- R3: (sc, inc) x 6 [18]
- R4: (2 sc, inc) x 6 [24]
- R5: (3 sc, inc) x 6 [30]
- R6 (BLO): sc around [30]
- R7-15: sc around (9 rounds) [30]
- Sl st to next st, FO, weave in end.
Macrame-Style Hanger (Cream/Beige Yarn):
This component is more decorative and can be achieved with simple crochet or actual macrame knots.
- Cut 4 long strands of cream yarn (approx. 24-30 inches each).
- Fold strands in half and loop them through the wooden ring, creating 8 working strands.
- Using simple square knots (or half hitch knots for a spiraled look), tie sections of the strands to create the macrame pattern visible in the image around the pot.
- Alternatively, crochet 4 long chains (approx. 15-20 inches each), then attach two chains together with sc or sl st about 3-4 inches down, forming loops. Repeat for the other two chains. Attach these sections to the top rim of the pot with a yarn needle, evenly spaced. Gather the top ends of the chains and thread them through the wooden ring, then secure.
- Leave the bottom ends as fringes or tie them into a decorative knot.
Assembly:
- Sew the yellow spadix onto the center of each red anthurium flower.
- Insert the wired stems into the base of each flower and leaf, securing with a few stitches or a dab of fabric glue if needed.
- Stuff the pot lightly. Arrange your wired flowers and leaves into the pot, pushing the stems into the stuffing to secure them. Bend and shape the wires to create a natural, appealing look.
- Add a layer of brown yarn ‘soil’ or real decorative moss on top of the stuffing for a realistic touch.
- Attach the macrame-style hanger to the pot. If using crochet chains, sew them securely around the top rim. If using actual macrame, position the knots to cradle the pot firmly.
- Ensure the hanger is balanced when lifted by the wooden ring.
Hang your beautiful, handmade crochet anthurium plant and enjoy its everlasting charm! This piece makes a fantastic gift or a delightful addition to your own home decor.
