Are you looking for a delightful new crochet project? This Hawk bird crochet will guide you through creating an adorable feathered companion perfect for your keys, bag, or as a charming gift!
Craft Your Own Chirpy Companion
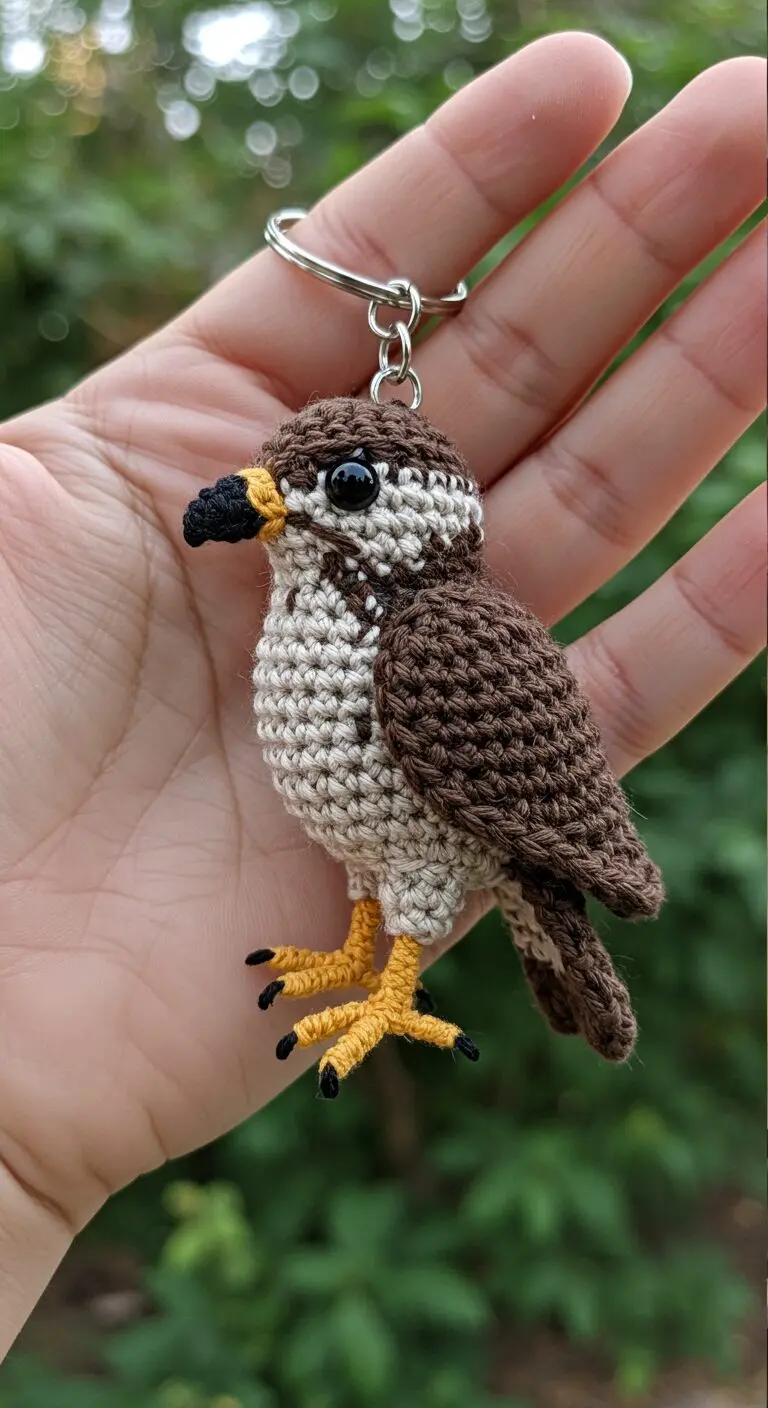
This little bird features lovely details like speckled chest feathers and tiny yellow feet, making it a unique and charming accessory. Suitable for intermediate crocheters or adventurous beginners, this pattern provides clear, step-by-step instructions. Let’s get started!
Materials
To create your mini Hawk Bird, you will need the following materials:
•Yarn: Sport weight or DK (Double Knitting) yarn in the following colors:
•Brown (for body, wings, and tail)
•Light Beige/Cream (for chest and belly)
•Yellow/Gold (for beak tip and feet)
•Black (for beak base and claws)
•Crochet Hook: Size 2.0mm or 2.25mm (B/1 or C/2 US size), or a size appropriate for your chosen yarn to ensure tight stitches and no stuffing shows through.
•Safety Eyes: 6mm black safety eyes.
•Stuffing: Polyester fiberfill.
•Tapestry Needle: For weaving in ends and assembly.
•Stitch Marker: To mark the beginning of rounds.
•Scissors
•Keychain Ring (optional, if making a keychain)
Abbreviations
This pattern uses US crochet terminology. Familiarize yourself with these abbreviations before you begin:
•MR: Magic Ring (also known as Magic Circle or Adjustable Ring)
•ch: Chain
•sc: Single Crochet
•inc: Increase (2 single crochet in one stitch)
•dec: Decrease (single crochet 2 stitches together)
•sl st: Slip Stitch
•FO: Fasten Off
•st(s): Stitch(es)
•R: Round/Row
•(**): Repeat instructions between asterisks the specified number of times
•(): Number in parentheses indicates the total number of stitches at the end of the round/row
Pattern Instructions
Body and Head (Brown and Light Beige/Cream)
Start with Light Beige/Cream yarn.
•R1: 6 sc in MR (6)
•R2: (inc) x6 (12)
•R3: (1 sc, inc) x6 (18)
•R4: (2 sc, inc) x6 (24)
•R5: (3 sc, inc) x6 (30)
•R6: (4 sc, inc) x6 (36)
•R7-R10: sc around (36) (4 rounds)
Change to Brown yarn.
•R11: (4 sc, dec) x6 (30)
•R12: sc around (30)
•R13: (3 sc, dec) x6 (24)
•R14: sc around (24)
•R15: (2 sc, dec) x6 (18)
Insert safety eyes between R13 and R14, approximately 5-6 stitches apart. Start stuffing firmly and continue to stuff as you go.
•R16: (1 sc, dec) x6 (12)
•R17: (dec) x6 (6)
FO, leaving a long tail for sewing. Close the opening with a tapestry needle.
Wings (Make 2, Brown)
Start with Brown yarn.
•R1: 6 sc in MR (6)
•R2: (1 sc, inc) x3 (9)
•R3: (2 sc, inc) x3 (12)
•R4-R7: sc around (12) (4 rounds)
Flatten the wing and sc through both layers to close the opening (6 sc). FO, leaving a long tail for sewing.
Tail (Brown)
Start with Brown yarn.
•R1: ch 6, sc in 2nd ch from hook, sc in next 4 ch (5)
•R2: ch 1, turn, sc in each st across (5)
•R3: ch 1, turn, dec, sc in next st, dec (3)
•R4: ch 1, turn, sc in each st across (3)
FO, leaving a long tail for sewing.
Beak (Black and Yellow/Gold)
Start with Black yarn.
•R1: 4 sc in MR (4)
•R2: sc around (4)
Change to Yellow/Gold yarn.
•R3: (1 sc, inc) x2 (6)
FO, leaving a long tail for sewing. Stuff lightly.
Feet (Make 2, Yellow/Gold and Black)
Start with Yellow/Gold yarn.
•R1: 4 sc in MR (4)
•R2-R4: sc around (4) (3 rounds)
To create the toes, you will make small chains and slip stitch back into the main foot piece.
•Toe 1: ch 3, sl st in 2nd ch from hook, sl st in next ch, sl st into the main foot piece.
•Toe 2: ch 3, sl st in 2nd ch from hook, sl st in next ch, sl st into the main foot piece.
•Toe 3: ch 3, sl st in 2nd ch from hook, sl st in next ch, sl st into the main foot piece.
Change to Black yarn.
•Claws: Using black yarn and a tapestry needle, embroider small claws at the end of each toe.
FO, leaving a long tail for sewing.
Assembly
1.Attach Wings: Sew the wings to the sides of the body, slightly behind the eyes, ensuring they are symmetrical.
2.Attach Tail: Sew the tail to the back bottom of the body.
3.Attach Beak: Sew the beak to the front of the head, centered between the eyes.
4.Attach Feet: Sew the feet to the bottom of the body, ensuring the hawk can stand (if desired) or is balanced for hanging.
5.Facial Details: Using brown yarn and a tapestry needle, embroider small lines above the eyes to create eyebrows, giving the hawk a more defined look as seen in the reference image.
6.Keychain Attachment: If making a keychain, attach the keychain ring to the top of the hawk’s head, centered.
7.Weave in all ends: Securely weave in any remaining loose yarn ends to give your hawk a neat and professional finish.
Congratulations! Your mini Hawk Bird amigurumi is now complete. Enjoy your new feathered friend!te! Enjoy your new bird keychain or gift it to a fellow bird lover. Happy crocheting!