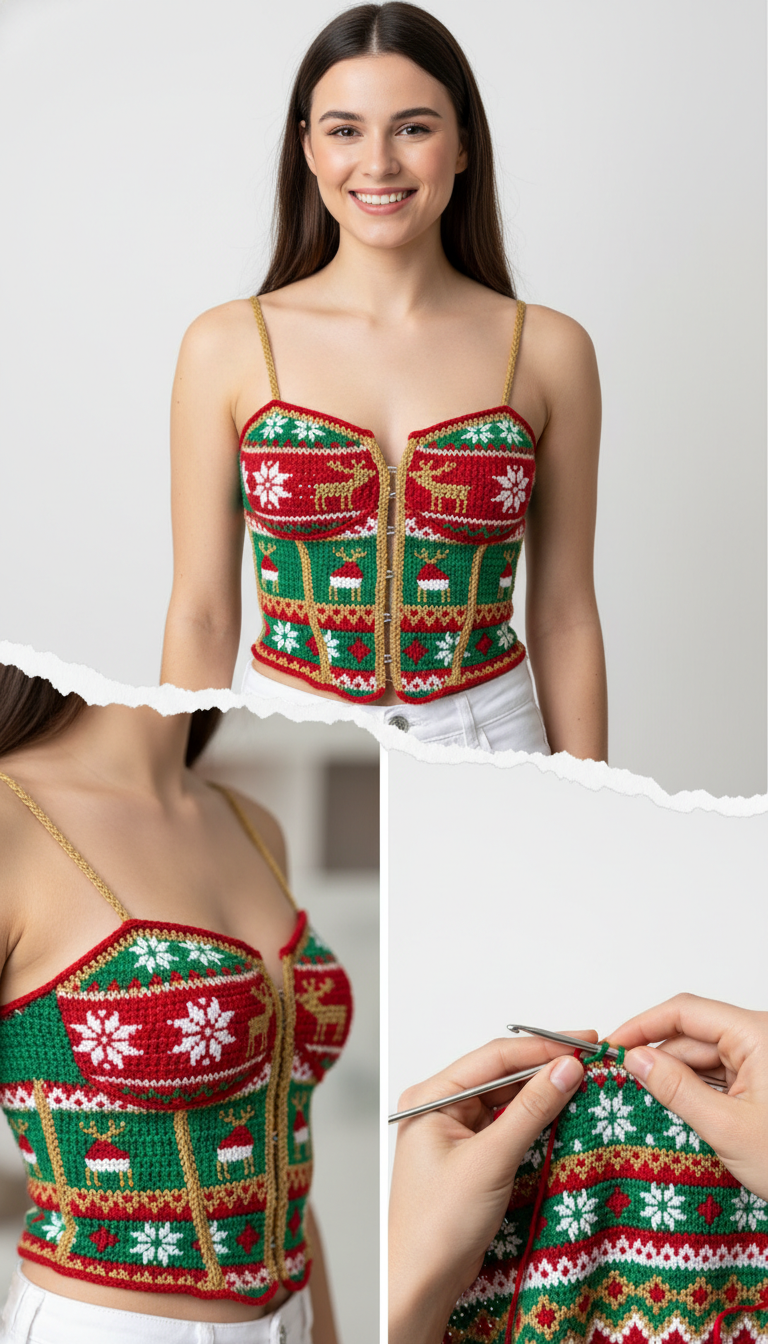
Get into the holiday spirit with this stunning crochet Christmas Corset Top! Featuring a vibrant Fair Isle design with festive reindeer and snowflakes, this unique crop top is perfect for holiday parties, festive gatherings, or simply adding a touch of cheer to your wardrobe. This pattern will guide you through creating a stylish and comfortable piece that captures the magic of the season.
Craft Your Own Unique Holiday Statement Piece
This meticulously designed crochet corset top goes beyond just being an outfit; it’s a wearable piece of art that embodies festive joy. Imagine turning heads at your next holiday event with this handmade creation. The intricate Fair Isle patterns and flattering silhouette make it a standout garment that celebrates both your crafting skills and the spirit of Christmas.
Crochet Pattern: Crochet Christmas Corset Top Pattern: Festive Fair Isle Holiday Crop
Materials
- DK weight yarn in Red (Color A)
- DK weight yarn in Green (Color B)
- DK weight yarn in White (Color C)
- DK weight yarn in Gold/Light Yellow (Color D)
- 3.0mm crochet hook (or size to obtain gauge)
- Tapestry needle
- Scissors
- Sew-on corset hooks and eyes (approx. 5-7 sets)
- Measuring tape
Abbreviations
- ch – chain
- sc – single crochet
- sl st – slip stitch
- inc – increase (2 sc in one stitch)
- dec – decrease (sc2tog)
- FO – fasten off
- st(s) – stitch(es)
- RS – right side
- WS – wrong side
- MC – main color
- CC – contrasting color
Instructions
Gauge: 24 sc x 26 rows = 4 inches (10 cm) in tapestry single crochet. Adjust hook size if necessary to obtain gauge. Working tightly is recommended for tapestry crochet.
Notes: This pattern uses tapestry crochet. Carry unused colors loosely along the top of your stitches and crochet over them. Change colors on the last pull-through of the previous stitch.
Section 1: Bust Cups (Make 2)
(Start with Color B for a border, then Color A for the main cup)
- Row 1 (Color B): Ch 21. Sc in 2nd ch from hook and in each ch across. (20 sc) Turn.
- Row 2 (Color B): Ch 1, sc in each st across. Turn.
- Row 3 (Color B, Snowflakes): Ch 1, sc in first 3 sts, *1 sc Color C, 3 sc Color B* repeat to last 4 sts, 1 sc Color C, 3 sc Color B. Turn. (This forms the top green border with white V-shapes/snowflakes. Adjust counts as needed for your specific snowflake motif.)
- Rows 4-10 (Color A, Snowflakes/Reindeer): Switch to Color A. Ch 1, work sc rows, incorporating white snowflakes (using Color C) and gold reindeer motifs (using Color D) according to the image. Each row will involve carrying multiple colors. Increase 1 st at the beginning and end of RS rows to shape the cup. (Specific stitch counts for increases will depend on desired cup size. Aim for a gradual increase).
- Row 11 (Color D, Gold Line): Ch 1, sc in each st across using Color D. Turn.
- Rows 12-18 (Color A, Reindeer): Switch back to Color A. Continue working sc rows, incorporating gold reindeer motifs (using Color D) and white snowflake accents (using Color C) as seen in the image. Continue increasing to shape the cup as needed.
- FO, leaving a long tail for sewing. Repeat for the second cup.
Section 2: Front Panels (Below Cups, Make 2)
(Start with Color B for the main body)
- Row 1 (Color B): Attach yarn to the bottom center of one bust cup. Ch 1, sc evenly across the bottom edge of the cup (approx. 30-40 sts, adjust based on cup size). Turn.
- Row 2 (Color B, Geometric Pattern): Ch 1, sc in each st across. Incorporate a geometric pattern using Color D and Color C as seen in the image (e.g., small squares or diamonds). Turn.
- Rows 3-6 (Color A, Geometric Pattern): Switch to Color A. Ch 1, work sc rows, incorporating gold geometric patterns (Color D) and small green accents (Color B) as depicted. Decrease 1 st at each end of RS rows for shaping if a fitted waist is desired.
- Rows 7-8 (Color D, Gold Line): Ch 1, sc in each st across using Color D. Turn.
- Rows 9-14 (Color B, Reindeer/Geometric): Switch to Color B. Work sc rows, incorporating gold reindeer or geometric patterns as seen on the lower green section of the front. Continue shaping as needed.
- Rows 15-16 (Color D, Gold Line): Ch 1, sc in each st across using Color D. Turn.
- Repeat for the second front panel. FO.
Section 3: Back Panel (Make 1)
(Start with Color B)
- Row 1: Ch 70 (or sufficient length to cover the back, matching the width of the two front panels joined). Sc in 2nd ch from hook and in each ch across. (69 sc) Turn.
- Rows 2-25: Ch 1, sc in each st across, following a similar colorwork pattern (bands of Color A, B, D with geometric designs) as the front panels. Adjust row counts and shaping to match the height and desired fit of the front panels.
- FO, leaving long tails for sewing.
Section 4: Assembly
- Step 1: Join Cups to Front Panels: Using the long tails, sew the bottom edge of each bust cup to the top edge of its corresponding front panel with a tapestry needle. Ensure patterns align.
- Step 2: Side Seams: Place the front panels (attached to cups) and the back panel with RS facing each other. Sew the side seams from the bottom edge up to the armhole.
- Step 3: Top Edging: With Color D, attach yarn to the top corner of one bust cup. Ch 1, sc evenly around the entire top edge of the garment, including the top of the bust cups and the back panel. Work 2 sc in corners to maintain shape. Sl st to join.
- Step 4: Bottom Edging: With Color D, attach yarn to one bottom side seam. Ch 1, sc evenly around the entire bottom edge of the garment. Sl st to join.
- Step 5: Front Opening Edging: With Color D, attach yarn to the bottom of one front opening. Ch 1, sc evenly up the entire front opening edge to the top of the bust cup. FO. Repeat for the other side of the front opening.
- Step 6: Straps (Make 2): Using Color D, ch 60 (or desired length for shoulder straps). Sl st in 2nd ch from hook and each ch across. FO. Sew one end of each strap to the top corner of each bust cup. Cross them in the back and sew to the top edge of the back panel, or sew straight over the shoulder.
- Step 7: Attach Corset Hooks: Carefully hand-sew the corset hooks and eyes along the center front opening, evenly spaced. Ensure they are secure.
- Finishing: Weave in all remaining loose ends securely with a tapestry needle. Block your top lightly if desired to even out stitches and shaping.