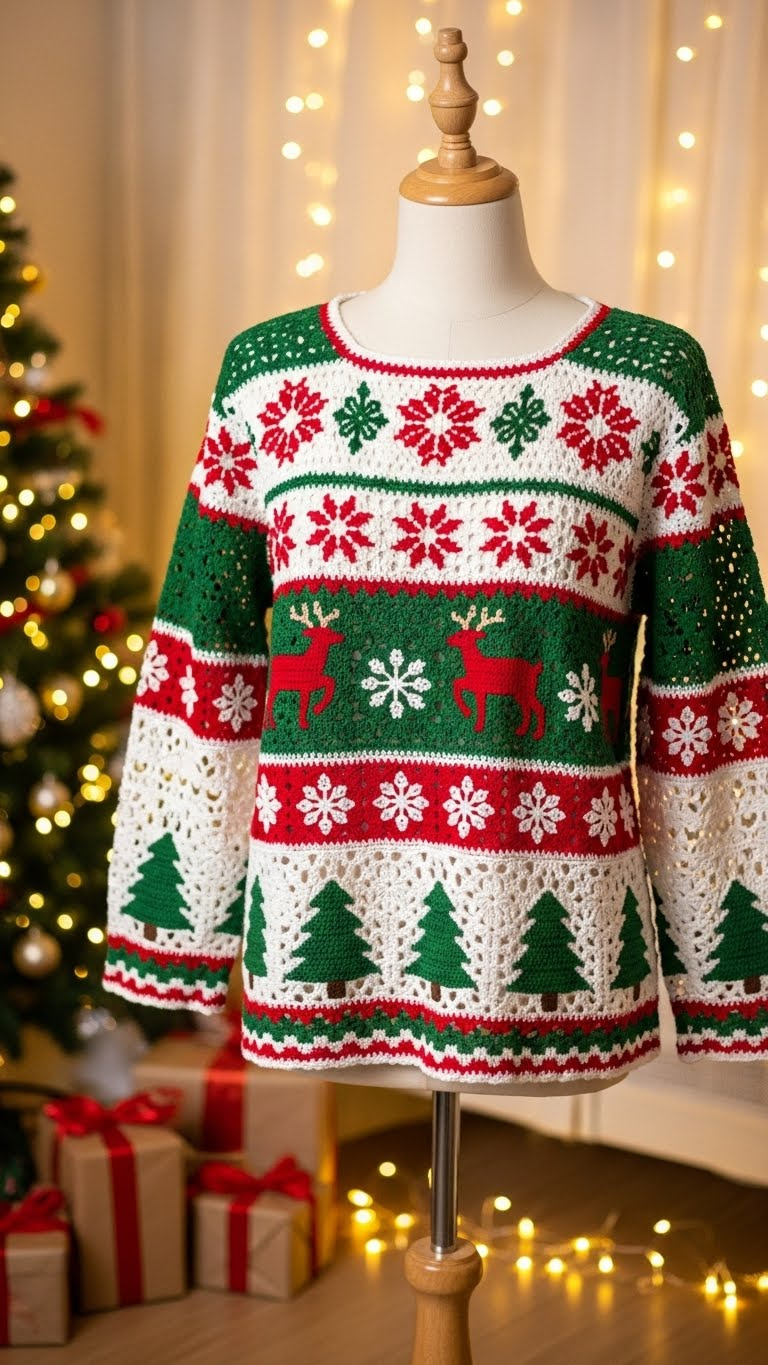
This stunning display captures the essence of holiday cheer with a meticulously crocheted Christmas sweater. Its vibrant green, red, and white hues are adorned with traditional festive motifs like snowflakes, reindeer, and evergreen trees. Such a charming garment instantly evokes feelings of warmth and joy, perfect for any seasonal celebration. The intricate patterns highlight the artistry involved in creating a unique Christmas sweater that stands out.
The Artistry Behind a Handcrafted Christmas Sweater
Beyond its aesthetic appeal, a handcrafted Christmas sweater carries a special sentiment, making it more than just clothing. Each stitch tells a story of dedication and creativity, transforming simple yarn into a wearable piece of holiday magic. Whether as a thoughtful gift or a personal treat, owning such a festive item truly elevates the spirit of the season. It serves as a cozy reminder of tradition and joy, perfectly complementing the twinkling lights of a Christmas tree.
Crochet Pattern: Festive Holiday Sweater
Embrace the holiday spirit with this delightful crochet sweater, featuring classic Christmas motifs like snowflakes, reindeer, and pine trees. This pattern is designed for an adult size Small/Medium, worked bottom-up primarily in half double crochet with tapestry crochet for the colorwork sections. Adjust hook size and stitch counts for different sizes.
Materials
- Worsted weight yarn (Aran/10 ply):
- Main Color (MC): White (approx. 800-1000 yards)
- Contrast Color 1 (CC1): Christmas Red (approx. 400-500 yards)
- Contrast Color 2 (CC2): Forest Green (approx. 400-500 yards)
- Contrast Color 3 (CC3): Brown (small amount for tree trunks, approx. 20-30 yards)
- Crochet Hook: H/5.0mm (or size to obtain gauge)
- Yarn Needle for weaving in ends
- Scissors
- Stitch Markers
- Measuring Tape
Abbreviations (US Terms)
- ch: chain
- sl st: slip stitch
- sc: single crochet
- hdc: half double crochet
- st(s): stitch(es)
- MC: Main Color (White)
- CC1: Contrast Color 1 (Red)
- CC2: Contrast Color 2 (Green)
- CC3: Contrast Color 3 (Brown)
- rep: repeat
- FO: fasten off
- WS: wrong side
- RS: right side
- sk: skip
- inc: increase (2 hdc in one st)
- dec: decrease (hdc2tog)
Gauge
14 hdc x 10 rows = 4″ x 4″ (10cm x 10cm) using H/5.0mm hook. Achieved in hdc stitches in rows.
Achieving the correct gauge is crucial for the sweater’s fit and motif clarity.
Special Stitch & Technique Notes
Tapestry Crochet: When changing colors, work the last yarn over of the stitch with the new color. Carry the unused yarn loosely along the top of the previous row’s stitches, crocheting over it. For larger color blocks, use separate bobbins to avoid carrying yarn too far across, securing them periodically to prevent tangles.
Color Changes: The pattern will specify color changes using MC, CC1, CC2, CC3. Always change color on the final yarn over of the stitch immediately before the new color is introduced.
Instructions
Body (worked in the round, bottom-up)
Starting Chain: With CC1, ch 140, join with sl st to first ch to form a ring, being careful not to twist. (Adjust ch count for desired circumference, ensuring it’s a multiple of 10 for motifs).
Ribbing (Rows 1-4):
- Row 1 (CC1): Ch 1 (does not count as st), sc in each ch around, join with sl st to first sc. (140 sc)
- Row 2 (CC2): Ch 1, sc in each st around, join with sl st to first sc. (140 sc)
- Row 3 (CC1): Ch 1, sc in each st around, join with sl st to first sc. (140 sc)
- Row 4 (CC2): Ch 1, sc in each st around, join with sl st to first sc. (140 sc)
Christmas Tree Band (Rows 5-14):
- Row 5 (MC): Ch 2 (does not count as st), hdc in each st around, join with sl st to first hdc. (140 hdc)
- Row 6 (MC, CC3, CC2): *Hdc 3 MC, hdc 1 CC3 (trunk), hdc 1 MC, hdc 1 CC3 (trunk), hdc 4 MC*. Repeat from * to * 14 times around. Join with sl st.
- Row 7 (MC, CC2): *Hdc 2 MC, hdc 2 CC2, hdc 1 MC, hdc 2 CC2, hdc 3 MC*. Repeat from * to * 14 times around. Join.
- Row 8 (MC, CC2): *Hdc 1 MC, hdc 3 CC2, hdc 1 MC, hdc 3 CC2, hdc 2 MC*. Repeat from * to * 14 times around. Join.
- Row 9 (MC, CC2): *Hdc 1 MC, hdc 8 CC2, hdc 1 MC*. Repeat from * to * 14 times around. Join.
- Row 10 (MC, CC2): *Hdc 2 MC, hdc 6 CC2, hdc 2 MC*. Repeat from * to * 14 times around. Join.
- Row 11 (MC, CC2): *Hdc 3 MC, hdc 4 CC2, hdc 3 MC*. Repeat from * to * 14 times around. Join.
- Row 12 (MC, CC2): *Hdc 4 MC, hdc 2 CC2, hdc 4 MC*. Repeat from * to * 14 times around. Join.
- Row 13 (MC): Ch 2, hdc in all 140 sts. Join.
- Row 14 (CC1, CC2 border): Ch 1, *sc 1 CC1, sc 1 CC2*. Repeat from * to * 70 times around. Join.
Red Snowflake Border (Rows 15-18):
- Row 15 (CC1): Ch 2, hdc in 140 sts. Join.
- Row 16 (CC1, MC): *Hdc 3 CC1, hdc 1 MC, hdc 2 CC1, hdc 1 MC, hdc 3 CC1*. Repeat from * to * 14 times around. Join. (This creates a simplified 10-stitch snowflake motif, 14 snowflakes total).
- Row 17 (CC1, MC): *Hdc 2 CC1, hdc 2 MC, hdc 2 CC1, hdc 2 MC, hdc 2 CC1*. Repeat from * to * 14 times around. Join.
- Row 18 (CC1, MC): *Hdc 3 CC1, hdc 1 MC, hdc 2 CC1, hdc 1 MC, hdc 3 CC1*. Repeat from * to * 14 times around. Join.
Green Reindeer & Snowflake Band (Rows 19-29):
- Row 19 (CC2): Ch 2, hdc in 140 sts. Join.
- Rows 20-28 (CC2 with CC1 Reindeer & MC Snowflakes): Work in hdc using CC2 as the background. Incorporate CC1 for reindeer motifs and MC for snowflakes. This section features larger, more complex motifs. For a 140 stitch circumference, aim for 7 reindeer and 7 snowflakes, alternating them in approx. 20-stitch repeats.
*Reindeer Motif (CC1):* Create a basic reindeer silhouette. This typically involves blocks of color for the body (approx. 12-15 stitches wide, 6-8 rows tall), with narrower blocks for legs, neck, head, and antlers. Use separate bobbins for each reindeer to manage CC1.
*Snowflake Motif (MC):* Create a simple 6-point snowflake (similar to Rows 16-18) over approximately 7-9 stitches wide and 4-6 rows tall, placed between reindeer. Use separate bobbins for MC.
Start by positioning the first reindeer, work background stitches until the first snowflake, then background to the next reindeer, and so on. Continue for 9 rows to build up the motifs. - Row 29 (CC2, CC1 border): Ch 1, *sc 1 CC2, sc 1 CC1*. Repeat from * to * 70 times around. Join.
White Snowflake Band (Rows 30-39):
- Row 30 (MC): Ch 2, hdc in 140 sts. Join.
- Rows 31-33 (MC, CC1, CC2 snowflakes): Work hdc in MC, creating alternating red (CC1) and green (CC2) snowflake motifs. (14 repeats of 10 stitches).
Row 31: *Hdc 3 MC, hdc 1 CC1, hdc 1 MC, hdc 1 CC2, hdc 4 MC*. Repeat from * to * 14 times around. Join.
Row 32: *Hdc 2 MC, hdc 2 CC1, hdc 2 MC, hdc 2 CC2, hdc 2 MC*. Repeat from * to * 14 times around. Join.
Row 33: *Hdc 3 MC, hdc 1 CC1, hdc 1 MC, hdc 1 CC2, hdc 4 MC*. Repeat from * to * 14 times around. Join. - Row 34 (MC): Ch 2, hdc in 140 sts. Join.
- Rows 35-39 (MC): Ch 2, hdc in 140 sts. Join. (Plain MC rows before armhole split).
Total Body Length: Approximately 15-16 inches from bottom ribbing to here. Adjust rows for desired length before armholes.
Divide for Armholes (Front and Back Panels)
The next section will be worked in rows, creating two separate panels (Front and Back). Skip 2 stitches at each side for the armhole opening.
Front Panel (70 sts):
- Row 40 (MC): Ch 2, hdc in next 70 sts, turn. (Leave remaining 70 sts for the back panel and 2 sts for the first armhole opening).
- Row 41 (MC, Armhole Shaping): Sl st into first 3 sts, ch 2, hdc in next 64 sts. Turn. (67 sts remaining)
- Row 42 (MC, Armhole Shaping): Sl st into first 3 sts, ch 2, hdc in next 61 sts. Turn. (64 sts remaining).
- Rows 43-44 (MC): Ch 2, hdc in all 64 sts. Turn.
- Rows 45-47 (MC, CC1, CC2 snowflakes): Repeat Body Rows 31-33 for the current 64 stitches, adjusting snowflake spacing (e.g., 6-7 repeats).
- Row 48 (MC): Ch 2, hdc in all 64 sts. Turn.
- Rows 49-52 (CC2): Ch 2, hdc in all 64 sts. Turn. (This forms the solid green shoulder band).
- Neckline Shaping (Rows 53-56):
Row 53 (CC2): Hdc in first 28 sts, leave center 8 sts unworked, hdc in last 28 sts. Turn. (28 sts each side).
Row 54 (CC2): Ch 2, hdc in 28 sts, turn.
Row 55 (CC2): Dec 1 st at neck edge (hdc2tog over last 2 sts of previous row), hdc to end. Turn. (27 sts).
Row 56 (CC2): Dec 1 st at neck edge, hdc to end. Turn. (26 sts). FO.
Rejoin CC2 to inner edge of second shoulder (skipping 8 center sts from Row 53), repeat Rows 54-56 for the second side.
Back Panel (70 sts):
- Row 40 (MC): With MC, join yarn to the stitch after the first armhole skip (skipping 70 sts for front panel and 2 sts for armhole), ch 2, hdc in next 70 sts, turn. Leave 2 sts unworked for armhole.
- Row 41 (MC, Armhole Shaping): Sl st into first 3 sts, ch 2, hdc in next 64 sts. Turn. (67 sts remaining).
- Row 42 (MC, Armhole Shaping): Sl st into first 3 sts, ch 2, hdc in next 61 sts. Turn. (64 sts remaining).
- Rows 43-44 (MC): Ch 2, hdc in all 64 sts. Turn.
- Rows 45-47 (MC, CC1, CC2 snowflakes): Repeat Body Rows 31-33 for the current 64 stitches, adjusting spacing.
- Row 48 (MC): Ch 2, hdc in all 64 sts. Turn.
- Rows 49-56 (CC2): Ch 2, hdc in all 64 sts. Turn. (Work 8 rows straight for the back shoulder/neckline). FO.
Sleeves (make 2, worked in the round)
Cuff Ribbing (Rows 1-4):
With CC1, ch 30, join with sl st to first ch. (Adjust ch count for wrist size, ensure it’s a multiple of 10 for symmetry).
- Row 1 (CC1): Ch 1, sc in each ch around, join. (30 sc)
- Row 2 (CC2): Ch 1, sc in each st around, join. (30 sc)
- Row 3 (CC1): Ch 1, sc in each st around, join. (30 sc)
- Row 4 (CC2): Ch 1, sc in each st around, join. (30 sc)
Sleeve Body (Rows 5-45, approx):
Work in hdc, following the same band pattern as the main body. Gradually increase stitches evenly by making 2 hdc in one stitch approximately every 3-4 rows (or 2-4 stitches per increase row) to widen the sleeve towards the armpit. Aim for approximately 50-54 hdc stitches before the final solid green section for armhole attachment.
- White Tree Band (approx. 10 rows): With MC, follow the pattern from Body Rows 5-13, adjusting motif size and spacing for sleeve circumference (e.g., 3 trees for 30 sts at cuff, increasing to 4-5 trees as sleeve widens). Ensure to include the CC1/CC2 border at the top of this band.
- Red Snowflake Border (approx. 4 rows): With CC1, follow the pattern from Body Rows 15-18, adjusting for sleeve width.
- Green Reindeer & Snowflake Band (approx. 10 rows): With CC2, follow the general guidance for Reindeer & Snowflake from Body Rows 20-28, adapting motif size and repetition to fit the sleeve. You will likely have fewer reindeer/snowflakes per round than the body. Ensure to include the CC2/CC1 border at the top of this band.
- White Snowflake Band (approx. 10 rows): With MC, follow the pattern from Body Rows 30-34 (red and green snowflakes), adapting for sleeve width.
- Solid Green Upper Sleeve (approx. 4-6 rows): With CC2, ch 2, hdc in each st around. Join.
FO, leaving a long tail for seaming.
Assembly and Finishing
1. Shoulder Seams: With RS together, sew the shoulder seams of the Front and Back panels using the long tails or whip stitch with a yarn needle.
2. Attach Sleeves: Align the center of the top of each sleeve with the shoulder seam. With RS together, sew the sleeves into the armholes using the long tails or whip stitch. Ensure the sleeve pattern aligns with the body pattern as closely as possible.
3. Neckline Trim: With CC1, join yarn to the back of the neckline. Ch 1, sc evenly around the entire neckline opening. Join with sl st to first sc. FO. (One or two rows of sc can be added for a cleaner edge, as preferred).
4. Weave in Ends: Securely weave in all remaining yarn ends using your yarn needle. Block your sweater gently to shape and set the stitches, especially the colorwork sections.
Your Festive Holiday Sweater is complete! Enjoy wearing your handmade creation.