Get ready to spread holiday cheer with this adorable Crochet Baby Santa Dress and Hat pattern! Perfect for festive photoshoots or Christmas gatherings, this outfit will make your little one the star of the season. Craft a cherished keepsake that captures the magic of their first (or second) Christmas.
Create Magical Holiday Memories with Handmade Charm
There’s nothing quite like the warmth and love woven into a handmade gift. This delightful Santa dress and hat set isn’t just an outfit; it’s a memory in the making. Imagine the smiles and joy as your baby dons this festive ensemble, creating picture-perfect moments that you’ll treasure for years to come. It’s a truly special way to celebrate the most wonderful time of the year!
Crochet Pattern: Enchanting Crochet Baby Santa Dress & Hat Pattern: A Handmade Christmas Treasure!
Materials
- Worsted Weight Yarn, Red (approx. 200-250g)
- Worsted Weight Yarn, White (approx. 50-75g)
- Small amount of Worsted Weight Yarn, Green (for embroidery)
- Crochet Hook (suggested: 4.0mm or G/6)
- Yarn needle
- Scissors
- 4-5 small pearl buttons (approx. 10-12mm)
- Pom-pom maker (optional, for hat)
Abbreviations
- ch – chain
- sl st – slip stitch
- sc – single crochet
- hdc – half double crochet
- dc – double crochet
- inc – increase (2 stitches in one stitch)
- dec – decrease (join 2 stitches together)
- FO – fasten off
- PM – place marker
- st(s) – stitch(es)
- rnd(s) – round(s)
- row(s) – row(s)
Instructions
This pattern is designed for approximately 6-12 month size, but can be adjusted by adding/removing rows or adjusting initial chain for different sizes. Please check your gauge.
Gauge:
16 dc x 10 rows = 4×4 inches (10×10 cm)
Dress:
Yoke (worked flat, then joined)
With Red yarn, ch 52 (adjust as needed for neck circumference).
- Row 1: Hdc in 2nd ch from hook and in each ch across. (51 hdc) Ch 2, turn.
- Row 2: Dc in first st, (inc in next st, dc in next 2 sts) repeat to last 2 sts, inc in next st, dc in last st. Ch 2, turn.
- Row 3: Dc in each st across. Ch 2, turn.
- Row 4: (Dc in first st, inc in next st) repeat across. Ch 2, turn. (Increases for chest shaping, adjust for desired width)
- Continue working rows of DC, increasing strategically to form a slightly flared yoke. Typically, you’d divide for armholes after about 8-10 rows (e.g., Row 5-8 straight DC rows).
- Divide for Armholes (example at end of Row 8): Work DC across first 1/4 of sts (front panel 1), skip 1/4 of sts (armhole), work DC across next 1/4 of sts (back panel), skip 1/4 of sts (armhole), work DC across last 1/4 of sts (front panel 2). Join with a sl st to the first DC of the row to form a seamless round for the body.
Body and Skirt (worked in rounds)
Continue with Red yarn.
- Rnd 1: Ch 2, dc in each st around. Join with sl st.
- Rnd 2-5: Ch 2, dc in each st around. Join with sl st. (Straight section of the body)
- Skirt Flare (example, adjust for desired fullness):
- Rnd 6: Ch 2, (dc in next 3 sts, inc in next st) repeat around. Join with sl st.
- Rnd 7-8: Ch 2, dc in each st around. Join with sl st.
- Rnd 9: Ch 2, (dc in next 4 sts, inc in next st) repeat around. Join with sl st.
- Rnd 10-11: Ch 2, dc in each st around. Join with sl st.
- Continue this pattern of increasing every few rounds until the dress reaches desired length. FO.
White Collar:
With White yarn, attach to the neck opening at the back.
- Row 1: Ch 1, sc evenly around the neck opening (approx. 50-60 sc depending on yoke size). Ch 1, turn.
- Row 2: Sc in first st, (inc in next st, sc in next 2 sts) repeat around. Ch 1, turn.
- Row 3-4: Sc in each st across. Ch 1, turn. (You can shape the collar more by skipping stitches at the back for a rounded look or adding more increases for a wider collar). FO.
White Cuffs (Make 2):
With White yarn, attach to the end of a sleeve.
- Rnd 1: Ch 1, sc evenly around the sleeve opening. Join with sl st.
- Rnd 2: Ch 1, sc in each st around. Join with sl st. FO.
White Skirt Trim:
With White yarn, attach to the bottom edge of the skirt.
- Rnd 1: Ch 1, sc evenly around the bottom edge of the skirt. Join with sl st.
- Rnd 2: Ch 1, sc in each st around. Join with sl st. FO.
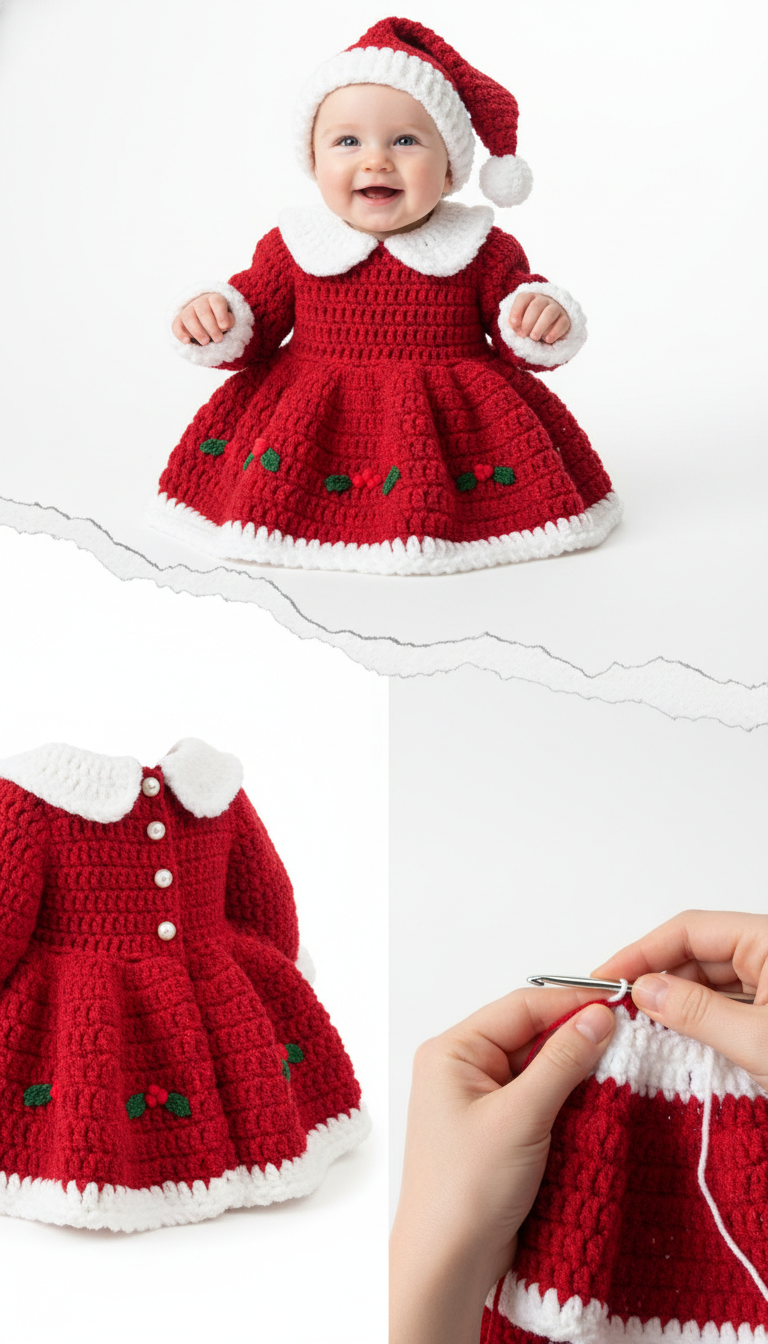
Holly Embellishments:
Using Green yarn and a yarn needle, embroider small leaf shapes onto the skirt as seen in the image (e.g., using chain stitch or surface slip stitch). Then, using Red yarn, embroider small berries (e.g., French knots or small circles) in clusters of three around the leaves.
Finishing the Dress:
Sew the pearl buttons onto the front center of the dress as decorative accents. Weave in all loose ends.
Santa Hat:
With Red yarn.
- Rnd 1: Make a magic ring, ch 2, 10 dc into ring. Join with sl st to first dc. (10 dc)
- Rnd 2: Ch 2, dc in first st, inc in next st. Repeat (dc, inc) around. Join with sl st. (15 dc)
- Rnd 3: Ch 2, dc in each st around. Join with sl st.
- Rnd 4: Ch 2, (dc in next 2 sts, inc in next st) repeat around. Join with sl st. (20 dc)
- Rnd 5: Ch 2, dc in each st around. Join with sl st.
- Continue increasing evenly every other round or every third round until the hat reaches the desired circumference for the baby’s head. Work straight rounds of dc until the hat reaches the desired height, leaving room for the white brim.
- Decreases for Point (example): Once at desired circumference, work several rounds of dc, then begin decreasing. For a gradual point, dc in next X sts, dec in next st, repeat around for a few rounds, then dc in next Y sts, dec in next st, etc., until only a few stitches remain. Cinch shut and FO.
White Hat Brim:
With White yarn, attach to the bottom edge of the hat.
- Rnd 1: Ch 1, sc evenly around the bottom edge of the hat. Join with sl st.
- Rnd 2-3: Ch 1, sc in each st around. Join with sl st. FO.
Pom-Pom:
Make a small white pom-pom (using a pom-pom maker or fork method). Attach it securely to the tip of the hat.
Final Touches:
Weave in any remaining loose ends. Enjoy your adorable handmade Santa outfit!