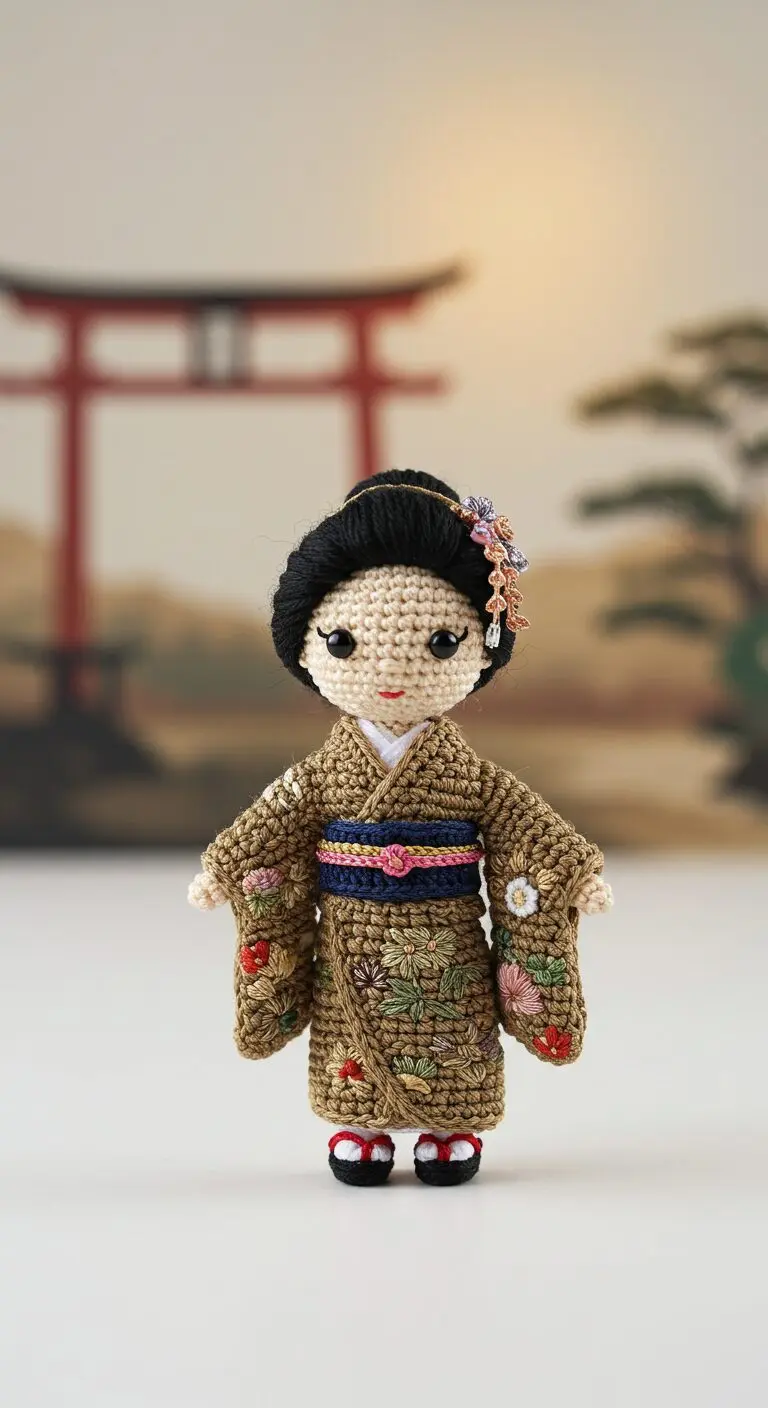
Step into the beautiful world of Japanese culture with this captivating Crochet Kimono Doll Amigurumi Pattern. Inspired by the grace and artistry of traditional Japanese attire, this detailed guide will help you create a charming amigurumi doll, complete with a beautifully embroidered kimono and elegant hairdo.
Craft Your Own Exquisite Kimono Doll Amigurumi
This project is perfect for intermediate crocheters looking to add a touch of intricate detail and cultural flair to their handmade collection. From the delicate floral embroidery on her kimono to her perfectly styled bun, every stitch is a step towards bringing this miniature masterpiece to life.
Materials You’ll Need:
- Yarn in Skin Tone (for head, hands, feet)
- Black Yarn (for hair, eyelashes)
- Brown Yarn (for kimono base)
- Dark Blue Yarn (for obi/sash)
- Pink Yarn (for obi accent)
- White Yarn (for under-kimono collar, socks)
- Red Yarn (for sandal straps)
- Small amounts of embroidery floss in various colors (pink, green, red, yellow, white, light blue for floral details)
- Small gold thread or fine yarn (for hair wrap)
- Small beads or charms (for hair ornament, optional)
- Safety Eyes (6mm or 8mm, black)
- Crochet Hook (suitable for your yarn weight, e.g., 2.0-2.5mm)
- Polyester Fiberfill for stuffing
- Yarn Needle
- Stitch Markers
- Scissors
- Fabric glue (optional, for securing small details)
Abbreviations:
- MR: Magic Ring
- ch: chain
- sc: single crochet
- inc: increase (2 sc in one stitch)
- dec: decrease (sc 2 stitches together)
- sl st: slip stitch
- FO: Fasten off
- st(s): stitch(es)
- BLO: Back Loop Only
- FLO: Front Loop Only
- (…) x N: Repeat instructions in parentheses N times
- [N]: Total number of stitches in the round
General Pattern Notes:
- Work in continuous rounds unless otherwise specified.
- Use a stitch marker to keep track of the first stitch of each round.
- Stuff firmly as you go.
Head (Skin Tone Yarn):
- R1: 6 sc in MR [6]
- R2: (inc) x 6 [12]
- R3: (sc, inc) x 6 [18]
- R4: (2 sc, inc) x 6 [24]
- R5: (3 sc, inc) x 6 [30]
- R6-11: sc around (6 rounds) [30]
- Insert safety eyes between R8 and R9, 5-6 sts apart. Embroider eyelashes with black yarn and a small red mouth.
- R12: (3 sc, dec) x 6 [24]
- R13: (2 sc, dec) x 6 [18]
- Stuff head firmly.
- R14: (sc, dec) x 6 [12]
- FO, leave a long tail for sewing.
Body (Skin Tone Yarn):
- R1: 6 sc in MR [6]
- R2: (inc) x 6 [12]
- R3: (sc, inc) x 6 [18]
- R4-8: sc around (5 rounds) [18]
- Stuff lightly. FO, leave a tail for sewing.
Arms (Make 2 – Skin Tone & Brown Yarn):
- With Skin Tone Yarn:
- R1: 5 sc in MR [5]
- R2-3: sc around (2 rounds) [5]
- Change to Brown Yarn.
- R4-9: sc around (6 rounds) [5]
- Stuff lightly. Flatten opening and sc across to close. FO, leave a tail for sewing.
Legs & Feet (Make 2 – Skin Tone, White, Red, Black Yarn):
- With Skin Tone Yarn:
- R1: 5 sc in MR [5]
- R2-3: sc around (2 rounds) [5]
- Change to White Yarn (for tabi socks).
- R4-5: sc around (2 rounds) [5]
- Change to Red Yarn (for sandal strap base).
- R6: sc around [5]
- Change to Black Yarn (for sandal sole).
- R7-8: sc around [5]
- Stuff lightly. Flatten and sc across to close. FO, leave a tail for sewing.
Kimono (Brown Yarn):
- This part is often crocheted separately and then sewn onto the body, or crocheted directly onto the body. For simplicity, we’ll suggest a separate piece.
- Start with a chain long enough to wrap around the doll’s widest part (approx. 25-30 ch). Join with sl st to form a ring.
- Work in rows or rounds, creating an open front. You’ll need to create the overlapping front panels.
- Rows 1-X: sc or hdc around, increasing slightly for shape, ensuring it widens to accommodate the doll’s body.
- For sleeves, you can either attach the pre-made arm sleeves or create large, wide rectangular pieces to sew onto the body/kimono as sleeves.
- Once the basic kimono shape is formed, sew it onto the doll’s body.
- Collar: With white yarn, crochet a narrow strip (approx. 2-3 sc wide, 15-20 ch long) and sew it around the neckline of the kimono, slightly peeking out.
Obi (Sash) (Dark Blue & Pink Yarn):
- With Dark Blue Yarn, ch approx. 20-25 (or length to wrap around doll’s waist).
- Row 1: sc in 2nd ch from hook, sc across. (approx. 18-23 sc)
- Rows 2-3: ch 1, sc across. FO.
- With Pink Yarn, make a thin strip (ch and sc for 1 row) to sew onto the middle of the dark blue obi for the accent.
- Wrap around the doll’s waist over the kimono and secure.
Hair (Black Yarn):
- Create a basic cap for the head by following the head increase rounds (e.g., up to R5 or R6 of head pattern).
- Attach strands of black yarn for bangs and sideburns (loop and tie method, or single crochet rows).
- For the bun, crochet a small sphere (e.g., 6 sc in MR, (inc)x6, sc around, (dec)x6) or wrap yarn around a base. Attach to the back of the head.
- Wrap a thin gold thread or fine yarn around the bun for detail.
- Hair Ornament: Create a tiny chain (approx. 5-7 ch), then sl st back, adding small beads or single crochet petals at the end. Attach to the side of the bun.
Embroidery Details:
- Using embroidery floss in various colors (pink, green, red, yellow, white, light blue), embroider small floral motifs and leaf patterns onto the kimono sleeves and front panels. Use simple stitches like lazy daisy stitch, French knots, and straight stitches.
- Refer to the image for placement and style.
Assembly:
- Sew the head to the body.
- Sew the arms to the sides of the body/kimono.
- Sew the legs to the bottom of the body.
- Ensure the kimono and obi are securely attached.
- Attach the hair cap and bun, then add the embroidered facial features.
- Finally, add the hair ornament.
Your beautiful Kimono Doll Amigurumi is now complete! Display her proudly as a testament to your crochet skills and appreciation for Japanese artistry. Happy crocheting!