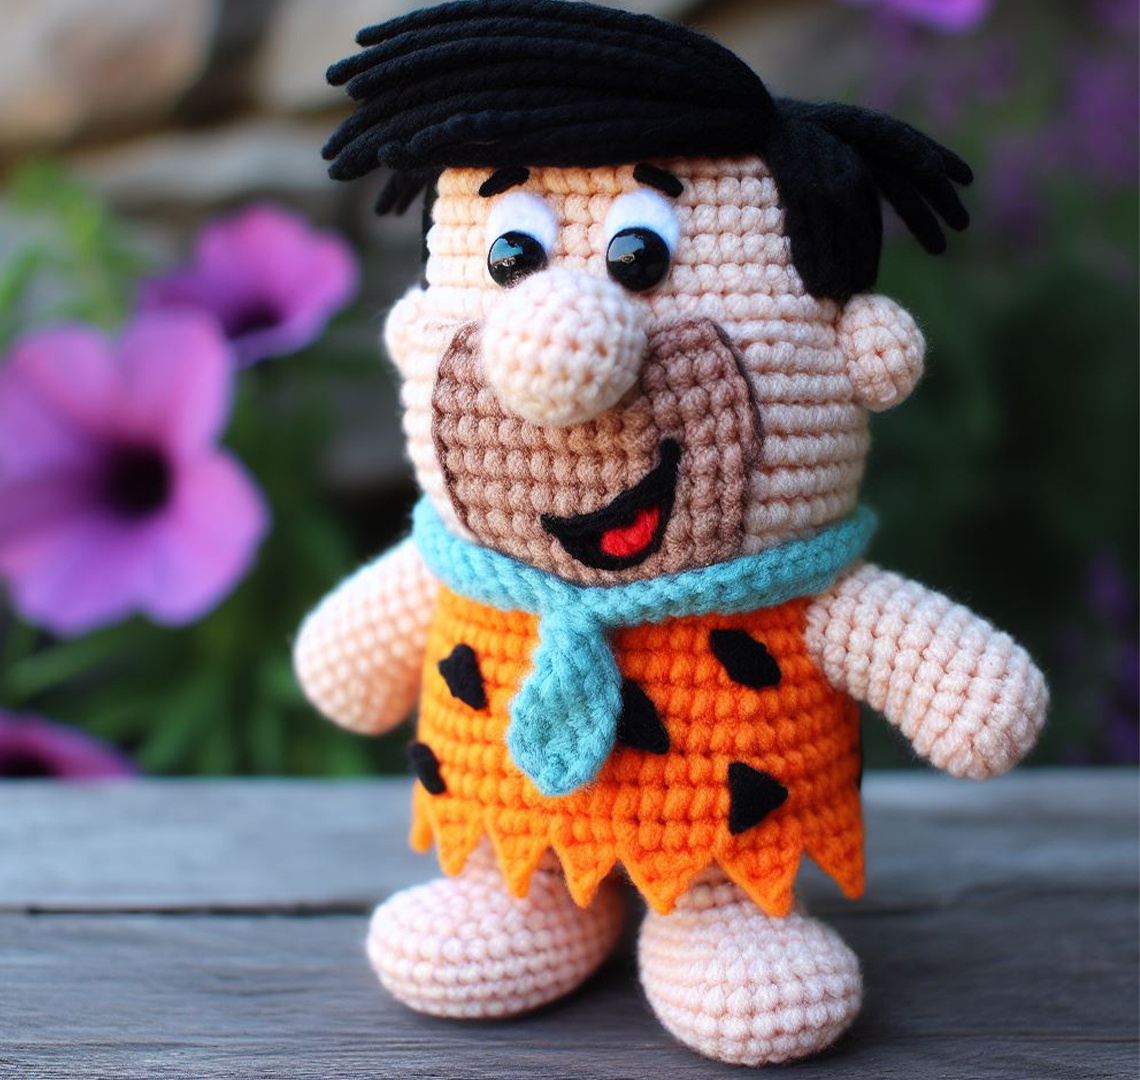
Dive into the world of amigurumi with the Fred Flintstone Amigurumi, a delightful crochet project that brings the iconic character from ‘The Flintstones’ to life. This pattern captures Fred’s signature look and robust personality, offering a nostalgic and enjoyable crafting experience for both experienced and novice crocheters
With clear instructions and helpful tips, the pattern ensures a smooth creation process, resulting in a unique, handmade keepsake of one of television’s most beloved characters. Start your Stone Age adventure today by scrolling down to access the free Fred Flintstone Amigurumi pattern!
Materials:
- Peach or light beige, black, blue, orange, white, and pink medium-weight yarn
- Crochet hook size 3.5 mm (E)
- Fiberfill stuffing
- Yarn needle
- Safety eyes
- Black embroidery floss for the eyebrows and mouth
Abbreviations:
- MR: Magic Ring
- sc: Single Crochet
- inc: Increase (2 sc in the same stitch)
- dec: Decrease (single crochet two stitches together)
- st(s): Stitch(es)
- sl st: Slip Stitch
- FO: Fasten Off
- hdc: Half Double Crochet
- dc: Double Crochet
- BLO: Back Loop Only
Body (Peach or Light Beige Yarn):
- MR, 6 sc in ring (6 sts)
- [inc] x6 (12 sts)
- [sc, inc] x6 (18 sts)
- [sc 2, inc] x6 (24 sts) 5-7. Sc around (24 sts)
- [sc 3, inc] x6 (30 sts) 9-11. Sc around (30 sts)
- [sc 4, inc] x6 (36 sts) 13-15. Sc around (36 sts)
- [sc 5, inc] x6 (42 sts) 17-19. Sc around (42 sts)
- [sc 6, inc] x6 (48 sts) 21-23. Sc around (48 sts)
- [sc 6, dec] x6 (42 sts)
- Sc around (42 sts)
- [sc 5, dec] x6 (36 sts)
- Sc around (36 sts)
- [sc 4, dec] x6 (30 sts)
- Sc around (30 sts)
- [sc 3, dec] x6 (24 sts) 31-33. Sc around (24 sts) Stuff firmly, FO leaving a long tail for sewing.
Head (Peach or Light Beige Yarn):
- MR, 6 sc in ring (6 sts)
- [inc] x6 (12 sts)
- [sc, inc] x6 (18 sts)
- [sc 2, inc] x6 (24 sts)
- [sc 3, inc] x6 (30 sts)
- [sc 4, inc] x6 (36 sts) 7-12. Sc around (36 sts)
- [sc 4, dec] x6 (30 sts) 14-15. Sc around (30 sts)
- [sc 3, dec] x6 (24 sts) 17-18. Sc around (24 sts)
- [sc 2, dec] x6 (18 sts)
- Sc around (18 sts)
- [sc, dec] x6 (12 sts)
- Sc around (12 sts)
- [dec] x6 (6 sts) Stuff the head, add safety eyes between rows 18 and 19, or approximately 2/3 up the head, about 6 stitches apart. Embroider the eyebrows above the eyes and the mouth below the nose, using black embroidery floss. FO leaving a long tail for sewing.
Ears (Peach or Light Beige Yarn):
- MR, 4 sc in ring (4 sts)
- [inc] x4 (8 sts)
- [sc, inc] x4 (12 sts) 4-5. Sc around (12 sts) FO, leaving a tail for sewing.
Arms (Peach or Light Beige Yarn):
- MR, 6 sc in ring (6 sts)
- [inc] x6 (12 sts) 3-10. Sc around (12 sts) Stuff lightly, FO leaving a long tail for sewing.
Legs (Peach or Light Beige Yarn):
- MR, 6 sc in ring (6 sts)
- [inc] x6 (12 sts)
- [sc, inc] x6 (18 sts) 4-6. Sc around (18 sts) Stuff lightly, FO leaving a long tail for sewing.
Hair (Black Yarn):
- Cut several strands of black yarn and attach them to the top of the head to form the hair. Make sure to create a distinct, bushy style as seen in the character.
Shirt (Orange Yarn):
- Chain a length that fits around the body’s widest part, sl st to form a ring.
- [ch 1 (does not count as a st), hdc in same st, 2 hdc in each st around, sl st to join] (creates the zigzag pattern at the bottom of the shirt).
- hdc around in BLO for the next few rows until the desired length of the shirt is achieved, typically about 6-7 rows.
- FO and sew onto the body.
Tie (Blue Yarn):
- Chain a length that hangs down the front of the shirt.
- Turn, hdc in each chain across for 2-3 rows to create the width of the tie.
- For the knot, create a small square piece and sew it at the top of the length of the tie.
- Attach the tie to the shirt at the neck.
Assembly:
- Sew the head onto the body.
- Attach the ears to the sides of the head.
- Sew the arms to the sides of the body, positioning them so they hang naturally.
- Attach the legs to the bottom of the body.
- Sew the shirt around the body.
- Add the tie to the shirt at the neckline.
Facial Features:
- Eyes: Use white yarn to create ovals for the eyes and sew them in place. Add safety eyes or black yarn to create the pupils.
- Nose: With peach/light beige yarn, create a small ball for the nose and sew it between the eyes.
- Mouth: Use pink yarn to create a smiling mouth and sew it below the nose.
Finishing Touches:
- Weave in all loose ends with a yarn needle.
The final amigurumi should closely resemble the character in the image, complete with all of the classic attributes and a vibrant, cartoonish aesthetic. Adjustments may be needed to get the proportions and details just right.
