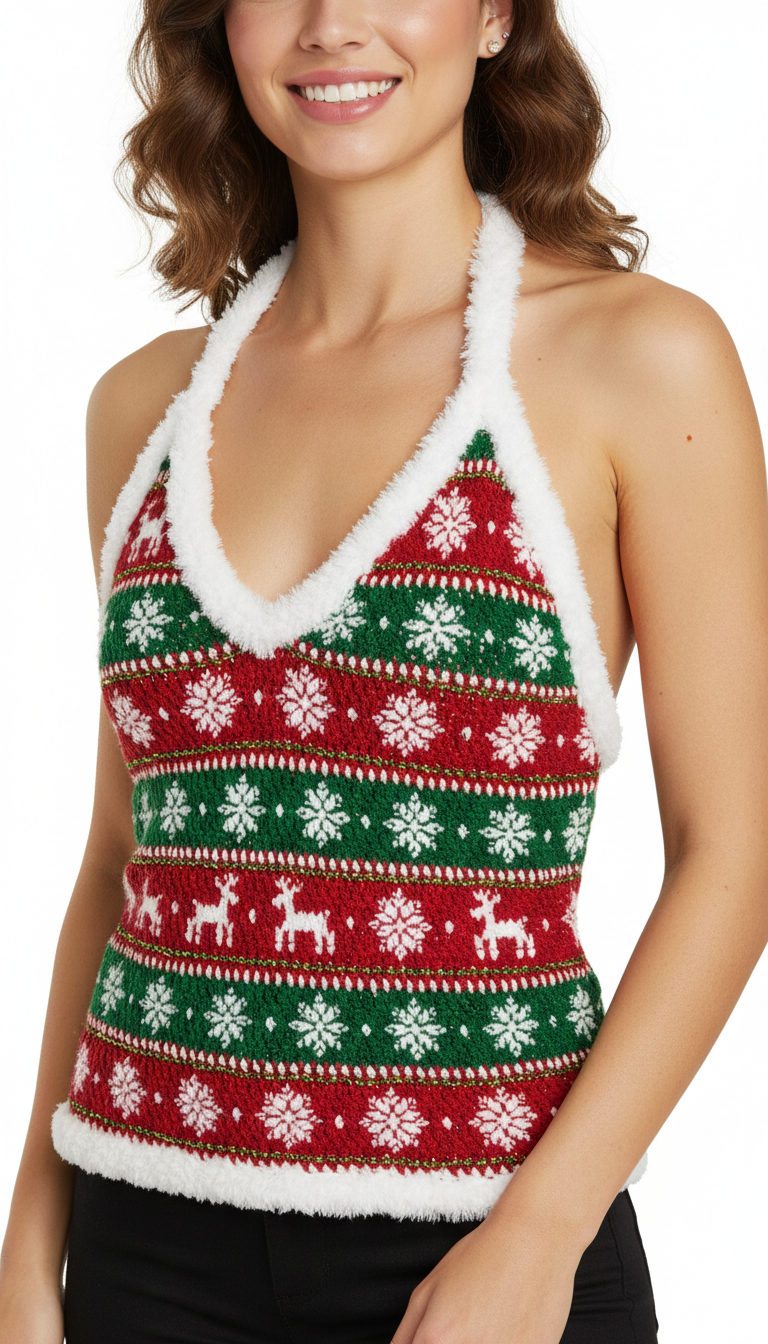
Get ready to spread holiday cheer with this adorable Crochet Christmas Halter Top pattern! Perfect for festive parties or as a unique gift, this top features classic holiday colors, charming snowflake and reindeer motifs, and a cozy faux fur trim. It’s a fun and quick project that will have you jingling all the way through the season in style.
Craft Your Perfect Holiday Statement Piece
Stand out from the crowd this holiday season with a handmade top that captures the spirit of Christmas. This pattern allows you to create a personalized, stylish piece that’s both festive and fashionable. Imagine the compliments you’ll receive wearing your unique, cozy creation to any holiday gathering!
Crochet Pattern: Jingle All The Way: Crochet Your Own Festive Christmas Halter Top
Materials
- Worsted Weight Yarn (Aran weight in UK terms) in Red (MC), Green (CC1), White (CC2)
- Metallic Green/Gold Fine Yarn (CC3) for stripes
- Fuzzy White Eyelash/Faux Fur Yarn (CC4) for trim
- 4.0mm (G/6) Crochet Hook
- Tapestry Needle
- Scissors
Abbreviations
- ch: chain
- sc: single crochet
- sl st: slip stitch
- st(s): stitch(es)
- MC: Main Color (Red)
- CC1: Contrasting Color 1 (Green)
- CC2: Contrasting Color 2 (White)
- CC3: Contrasting Color 3 (Metallic Green/Gold)
- CC4: Contrasting Color 4 (Fuzzy White)
- rep: repeat
- dec: decrease (sc2tog)
Instructions
Gauge: 18 sc and 20 rows = 4 inches (10 cm) (adjust hook size if necessary to obtain gauge)
Notes:
This top is worked in two flat panels (front and back) from the bottom up, then seamed. Colorwork is done using the tapestry crochet method, carrying unused colors loosely under your stitches. When changing colors, pull through the last loop of the previous stitch with the new color.
Front Panel
With MC (Red), ch 80 (or desired width, ensuring an even number of stitches for pattern repeat). Sc in 2nd ch from hook and in each ch across. (79 sc)
Row 1 (Pattern Base): Ch 1, turn. Sc in each st across. Change to CC4 (Fuzzy White) in last st. (79 sc)
Fuzzy Trim Base Row: Ch 1, turn. Sc in each st across with CC4. Change to MC (Red) in last st. (79 sc)
Main Body Pattern (Repeat for desired length before shaping):
- Red Snowflake Section (approx. 6 rows): With MC, work in sc. On specific rows, incorporate CC2 (White) for snowflake motifs. (Example: for snowflakes, work a few sc in MC, then 3 sc in CC2, few sc in MC, rep. Stagger these for a scattered look.)
- Metallic Stripe (1 row): Change to CC3 (Metallic). Ch 1, turn. Sc in each st across. Change to CC1 (Green) in last st.
- Green Snowflake Section (approx. 6 rows): With CC1, work in sc. On specific rows, incorporate CC2 (White) for snowflake motifs, similar to the red section.
- Metallic Stripe (1 row): Change to CC3. Ch 1, turn. Sc in each st across. Change to MC (Red) in last st.
- Red Reindeer Section (approx. 6 rows): With MC, work in sc. On specific rows, incorporate CC2 (White) for reindeer motifs. (Example: for reindeer, work a few sc in MC, then a block of 5-7 sc in CC2, few sc in MC, rep. Refer to image for spacing and shape.)
- Metallic Stripe (1 row): Change to CC3. Ch 1, turn. Sc in each st across. Change to CC1 (Green) in last st.
- Repeat Green Snowflake, Metallic Stripe, Red Snowflake, Metallic Stripe until panel reaches desired height before armhole shaping (approx. 10-12 inches from bottom trim, or adjust as needed).
Armhole and Halter Neck Shaping (Front Panel):
Continue with the established color pattern while shaping.
- Rows 1-2 (Armhole Decrease): Ch 1, turn. Dec (sc2tog) in first 2 sts, sc across to last 2 sts, dec in last 2 sts. (2 sts decreased per row). Rep for 2 rows.
- Halter Neck Split and Decrease (Continue for approx. 10-12 rows, or until desired strap width): Ch 1, turn. Sc in first stitch, then dec in next 2 sts. Work sc across to the center of the panel. Stop here, leaving remaining sts unworked for this side. Ch 1, turn. *Dec in first 2 sts, sc across to last 2 sts, dec in last 2 sts. Rep until 3-4 sts remain for strap width. Work these remaining sts in sc rows for approx. 8-10 inches (or desired strap length). Fasten off.
- Join yarn to the opposite side of the neck split. Ch 1, turn. Sc across to last 3 sts, dec in next 2 sts, sc in last st. Ch 1, turn. *Dec in first 2 sts, sc across to last 2 sts, dec in last 2 sts. Rep until 3-4 sts remain for strap width. Work these remaining sts in sc rows for approx. 8-10 inches (or desired strap length). Fasten off.
Back Panel
Work as for the Front Panel until the armhole shaping section (approx. 10-12 inches from bottom trim).
- Rows 1-2 (Armhole Decrease): Ch 1, turn. Dec (sc2tog) in first 2 sts, sc across to last 2 sts, dec in last 2 sts. (2 sts decreased per row). Rep for 2 rows.
- Upper Back: Ch 1, turn. Sc in each st across for approx. 6-8 rows (or desired back height). Fasten off.
Assembly
- Place front and back panels with right sides facing. Sl st or sc along the side seams to join.
- Attach the halter straps by tying them behind the neck or sewing them to the top of the back panel.
Fuzzy Trim
- With CC4 (Fuzzy White) yarn, join with a sl st to the bottom hem. Ch 1, sc evenly around the entire bottom edge. Sl st to first sc. Fasten off.
- Join CC4 to a top corner of the front panel. Ch 1, sc evenly along the entire neckline and armhole edges, including the straps. Sl st to first sc. Fasten off.