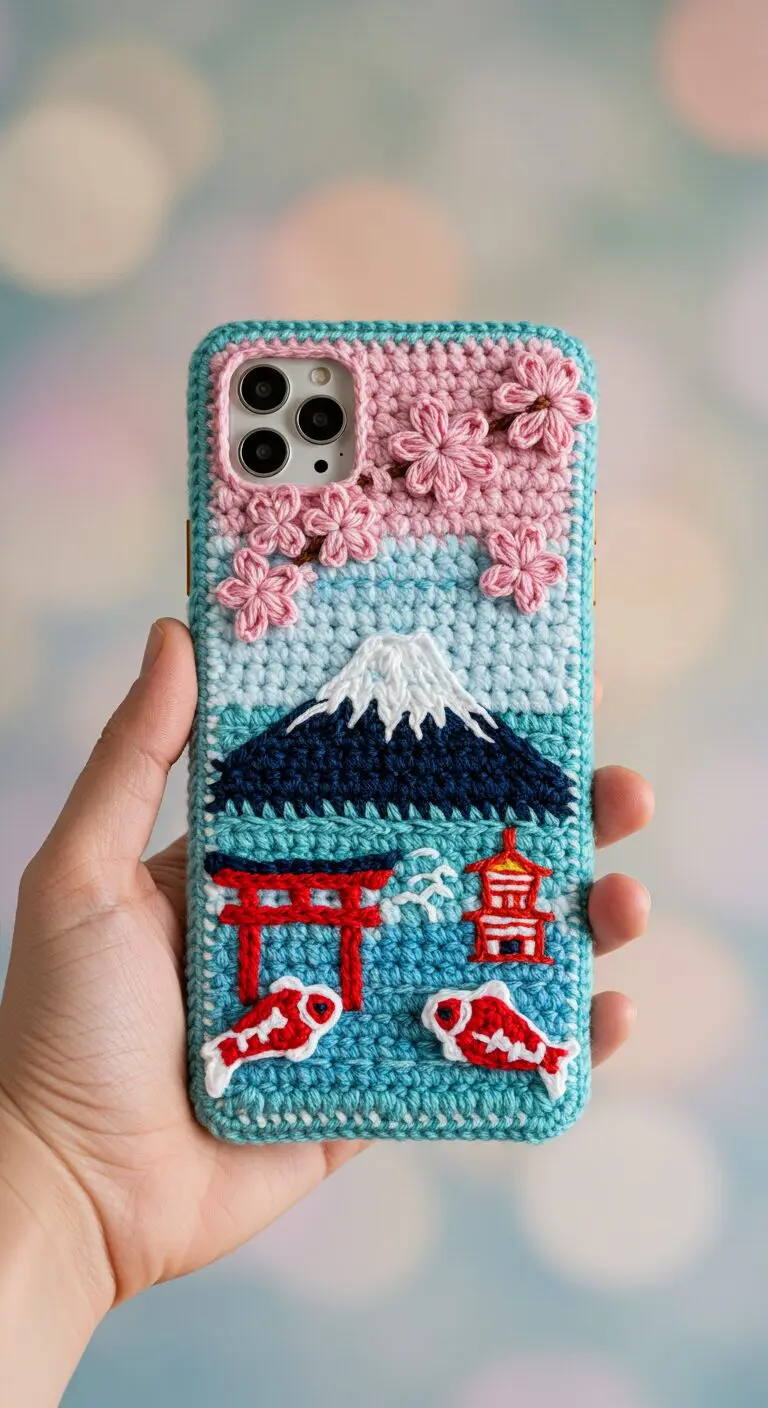
Are you captivated by the beauty of Japanese landscapes? Now you can carry a piece of that serene artistry with you everywhere you go! This guide will help you create a stunning, custom-fit crochet phone case adorned with iconic Japanese elements: delicate cherry blossoms, majestic Mount Fuji, a traditional torii gate, a charming pagoda, and graceful koi fish.
Craft Your Own Japanese-Inspired Phone Case
This unique phone case isn’t just a protector; it’s a portable work of art! While a full, stitch-by-stitch pattern for every tiny detail would be extensive, we’ll provide a framework for the case and detailed guidance on how to create and assemble each beautiful applique. Get ready to personalize your device with a touch of handcrafted elegance.
Materials You’ll Need:
- Yarn in various colors: Light Pink (cherry blossoms), Brown (branches), Light Blue (sky), White (Fuji snow, koi accents), Dark Blue (Fuji base), Red (torii, pagoda, koi), Aqua/Turquoise (water/base case). Worsted weight cotton yarn is recommended for durability and stitch definition.
- Crochet hook appropriate for your yarn (e.g., 3.0mm or 3.5mm)
- Yarn needle for weaving in ends and attaching appliques
- Scissors
- Stitch markers (optional, but helpful)
- Your phone (for exact sizing!)
Abbreviations:
- ch: chain
- sc: single crochet
- sl st: slip stitch
- inc: increase (2 sc in one stitch)
- dec: decrease (sc 2 stitches together)
- FO: Fasten off
- st(s): stitch(es)
- (…) x N: Repeat instructions in parentheses N times
- [N]: Total number of stitches in the round/row
Part 1: The Phone Case Base (Aqua/Turquoise Yarn)
This pattern creates a simple pouch. Adjust the starting chain and rows to fit your specific phone model. You’ll be working in rows and then joining to form a pouch.
- Measure Your Phone: Measure the width of your phone. Chain enough stitches so that your chain, when laid flat, is slightly less than your phone’s width (it will stretch). Make sure your chain length allows for an even number of stitches for the body.
- Row 1: Sc in the 2nd ch from hook and in each ch across. Ch 1, turn. [Your stitch count, e.g., 25-35 sc]
- Rows 2-X: Sc in each stitch across. Ch 1, turn. Continue until your piece is long enough to wrap around your phone from front to back, covering the bottom edge as well. For a seamless look, aim for a length that is about twice your phone’s height plus its depth.
- Forming the Pouch: Fold your crocheted rectangle in half, bringing the shorter ends together. Using your hook or a yarn needle, slip stitch or single crochet the side seams together, leaving the top open for your phone. FO.
- Top Edge (Optional): For a neat finish around the top opening, sc evenly around the top edge. FO and weave in ends.
Part 2: Crafting the Japanese Motifs (Appliques)
Now for the fun part! You will create individual flat pieces (appliques) for each element and sew them onto your finished phone case. Use single crochet (sc) or slip stitches (sl st) predominantly to keep them flat. Experiment with shapes and sizes to fit your case.
The Sky and Cherry Blossoms (Light Pink & Brown Yarn):
- Pink Sky Strip: Crochet a rectangular strip of light pink single crochet stitches, sized to cover the top portion of your phone case (where the camera cut-out is). You can either make a separate strip or integrate it directly into the top rows of your base case if you’re comfortable with color changes.
- Cherry Blossoms: Create small, simple 5-petal flowers using light pink yarn. A common way is to make a magic ring, then (ch 2, 2 dc, ch 2, sl st) x 5 times into the ring. You can also look up “easy crochet cherry blossom pattern” for variations. Make several.
- Branches: Using brown yarn, embroider simple thin lines or chain stitches to form branches behind and between your blossoms.
Mount Fuji (Dark Blue & White Yarn):
- Crochet a triangle shape for the mountain base using dark blue yarn. Start with a foundation chain, then decrease stitches evenly on both ends of subsequent rows until you form a peak.
- For the snowcap, use white yarn to crochet a smaller, slightly rounded triangle or abstract shape that fits over the peak of your blue mountain.
The Water and Structures (Light Blue, Red, Yellow Yarn):
- Light Blue Water: The middle section of the case (below the pink sky and Fuji) will be light blue, mimicking water. This can be directly incorporated into your base case’s color changes if you’re doing a flat piece before seaming, or crocheted as another rectangular applique.
- Torii Gate: Using red yarn, crochet two vertical strips and one or two horizontal strips. You can make them as simple chains covered in single crochet, or work a few rows of sc for a thicker look. Assemble and stitch them into the iconic gate shape.
- Pagoda: Use red yarn for the main structure. Crochet small rectangles and gradually decreasing rows for the tiered roof effect. You can add tiny yellow stitches for window details.
- Koi Fish: With red yarn, crochet two small oval or teardrop shapes. Use white yarn to embroider the details and fin outlines as seen in the image.
- Water Ripples: Use white or a lighter blue yarn to embroider small “V” shapes or wavy lines onto the light blue water section for a ripple effect.
Part 3: Assembly
- Carefully arrange all your crocheted appliques on the front of your phone case base. Take a photo to remember your layout before you start sewing.
- Using your yarn needle and corresponding yarn colors, carefully sew each applique onto the phone case. Use small, neat stitches to ensure they are secure and the thread is hidden.
- Weave in all remaining loose ends securely on the inside of the case.
And there you have it! A beautiful, custom-made crochet phone case that not only protects your device but also showcases your love for Japanese art and your amazing crochet skills. Enjoy your unique creation!