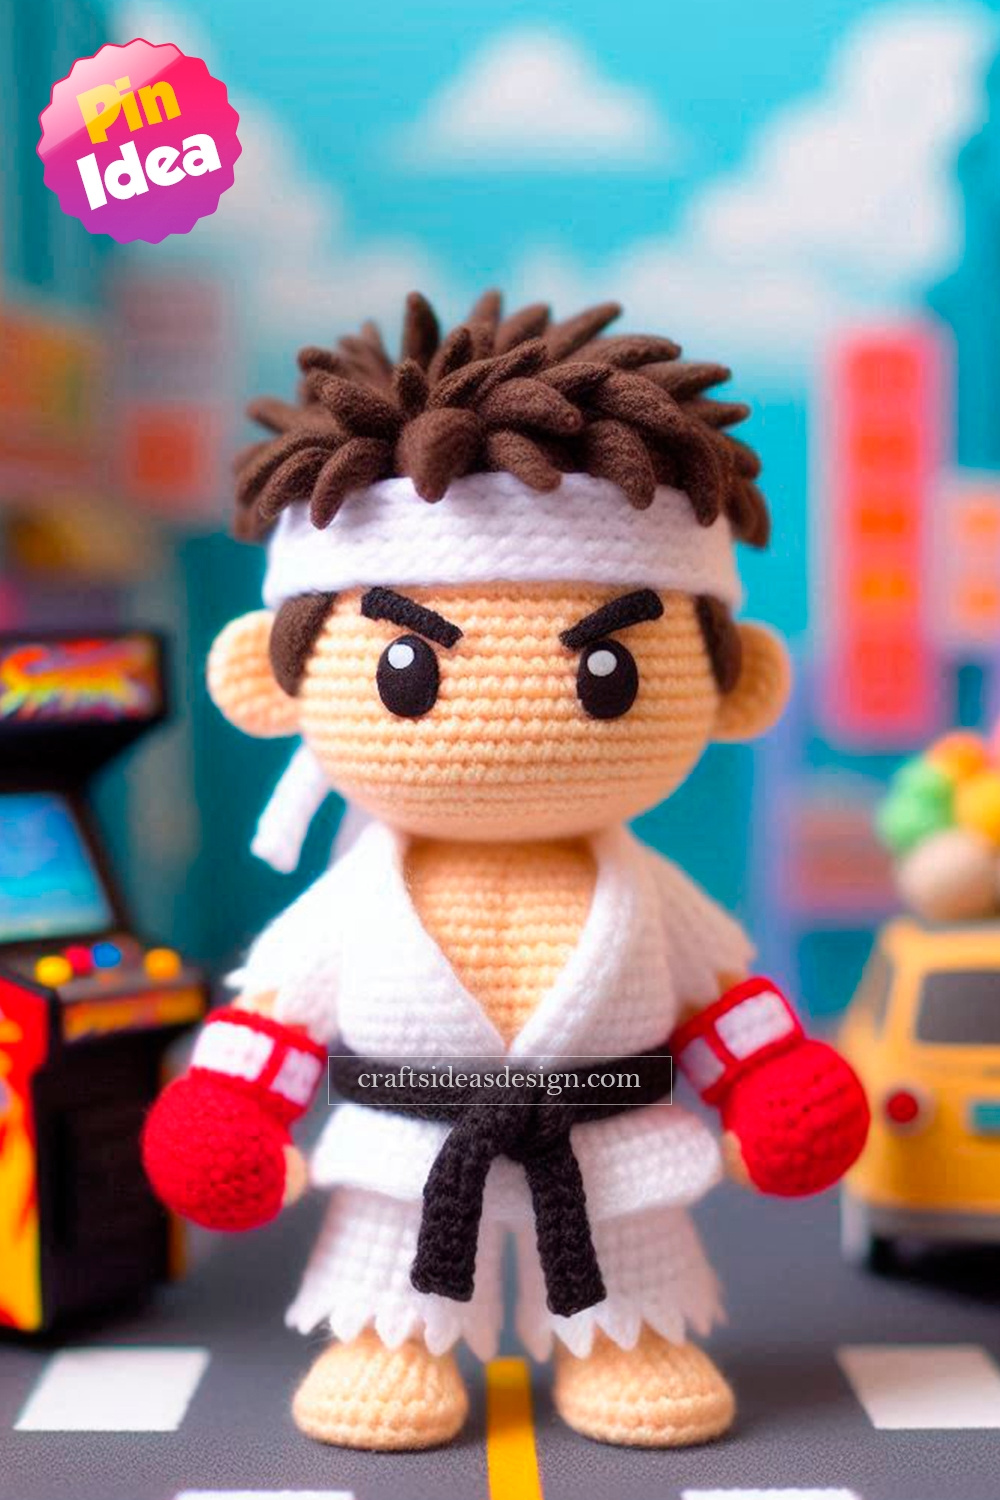
The Street Fighter Ryu Amigurumi is a fantastic crochet project for fans of the iconic fighting game. With his white gi, red headband, and serious expression, this amigurumi captures Ryu’s determined spirit and powerful energy.
How to Crochet Your Own Street Fighter Ryu Amigurumi
Making your own Street Fighter Ryu Amigurumi combines basic and intermediate crochet techniques to create Ryu’s signature look, including his gi, belt, and headband. This cute and fierce Street Fighter Ryu Amigurumi is perfect for any Street Fighter fan, adding a touch of nostalgia and personality to your collection.
Materials:
- Beige or skin-toned yarn (for the skin)
- Black yarn (for the hair and eyebrows)
- White yarn (for the gi outfit)
- Red yarn (for the headband and wrist wraps)
- Brown yarn (for the belt)
- Polyester fiberfill (for stuffing)
- 10mm safety eyes or black yarn for crocheted eyes
- Yarn needle
- 2.5mm or 3.0mm crochet hook (depending on your yarn size)
- Stitch marker
- Scissors
Abbreviations:
- MR: Magic ring
- ch: Chain
- sc: Single crochet
- inc: Increase (2 sc in the same stitch)
- dec: Decrease (sc two stitches together)
- sl st: Slip stitch
- st(s): Stitch(es)
- FO: Fasten off
Head (Beige or Skin-Toned Yarn):
- Round 1: Make a magic ring (MR), 6 sc in the ring. (6 sts)
- Round 2: Inc in each stitch around. (12 sts)
- Round 3: 1 sc, inc repeat around. (18 sts)
- Round 4: 2 sc, inc repeat around. (24 sts)
- Rounds 5-10: Sc in each stitch around. (24 sts)
- Insert safety eyes between rounds 6 and 7, spaced evenly.
- Round 11: 2 sc, dec repeat around. (18 sts)
- Begin stuffing the head with fiberfill.
- Round 12: 1 sc, dec repeat around. (12 sts)
- Round 13: Dec in each stitch around. (6 sts)
- FO and leave a long tail for sewing.
Hair (Black Yarn):
- Round 1: Make a MR, 6 sc in the ring. (6 sts)
- Round 2: Inc in each stitch around. (12 sts)
- Round 3: 1 sc, inc repeat around. (18 sts)
- Round 4: Sc in each stitch around. (18 sts)
- FO and leave a long tail for sewing.
- Attach the hair piece to the top of the head. You can add extra yarn strands to create a spiky hair look by cutting short strands of black yarn and attaching them to the scalp using the latch hook method.
Body (White Yarn for Gi):
- Round 1: Make a MR, 6 sc in the ring. (6 sts)
- Round 2: Inc in each stitch around. (12 sts)
- Round 3: 1 sc, inc repeat around. (18 sts)
- Rounds 4-10: Sc in each stitch around. (18 sts)
- Begin stuffing the body with fiberfill.
- Round 11: 1 sc, dec repeat around. (12 sts)
- Round 12: Dec in each stitch around. (6 sts)
- FO and leave a long tail for sewing.
Arms (Make 2 – Beige Yarn for Hands, White Yarn for Gi):
- Round 1: With beige yarn, make a MR, 6 sc in the ring. (6 sts)
- Round 2: Sc in each stitch around. (6 sts)
- Switch to white yarn for the gi sleeves.
- Rounds 3-8: Sc in each stitch around. (6 sts)
- Lightly stuff the arms.
- FO and leave a tail for sewing. Attach the arms to the sides of the body.
Legs (Make 2 – Beige Yarn for Feet, White Yarn for Pants):
- Round 1: With beige yarn, make a MR, 6 sc in the ring. (6 sts)
- Round 2: Inc in each stitch around. (12 sts)
- Rounds 3-5: Sc in each stitch around. (12 sts)
- Switch to white yarn for the pants.
- Rounds 6-10: Sc in each stitch around. (12 sts)
- Lightly stuff the legs.
- FO and leave a tail for sewing. Attach the legs to the bottom of the body.
Belt (Brown Yarn):
- Round 1: Ch 25 (or adjust based on the body’s size).
- Sl st back across the chain. FO and attach the belt around the waist, securing it with a stitch at the front.
Red Headband (Red Yarn):
- Round 1: Ch 30 (or adjust to fit around the head).
- Sl st back across the chain to create a headband.
- FO and tie the headband around Ryu’s head, leaving the ends of the headband dangling at the back.
Wrist Wraps (Make 2 – Red Yarn):
- Round 1: Ch 12 (or adjust to fit around the wrists).
- Sl st back across the chain to create wrist wraps.
- Attach the wraps to the arms, just above the hands, and tie them securely.
Assembly:
- Head to Body: Sew the head securely onto the body.
- Arms and Legs: Attach the arms to the sides of the body and the legs to the bottom.
- Belt: Attach the brown belt around the waist.
- Headband: Tie the red headband around Ryu’s head, with the ends dangling.
- Face Details: Use black yarn or embroidery thread to create Ryu’s serious eyebrows and mouth.
Final Touches:
- Ensure all parts are securely sewn and adjust stuffing as needed.
- Add any extra details, such as additional stitching on the gi or more expression to Ryu’s face for a customized look.
Congratulations! Your Street Fighter Ryu Amigurumi is now complete. This tough yet adorable version of the Street Fighter legend makes a great addition to your crochet collection or a special gift for fans of the iconic video game character.
