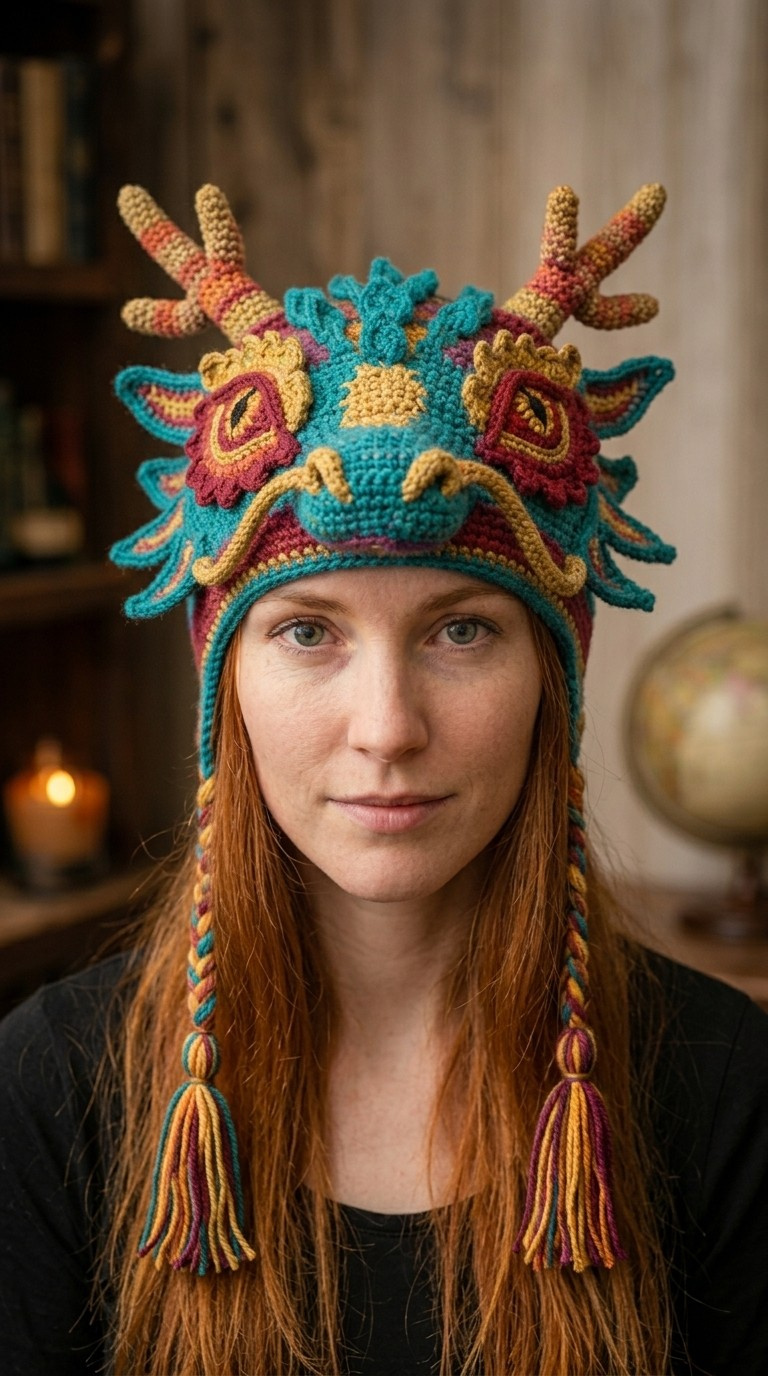
Dive into a world of fantasy with this vibrant and enchanting crochet dragon hat! Perfect for cosplay, chilly adventures, or simply adding a touch of magic to your everyday wear. This pattern features playful horns, intricate scale details, and charming braided earflaps, making it a unique accessory for any dragon lover.
Craft a Mythical Masterpiece: Why You’ll Love This Dragon Beanie
This isn’t just a hat; it’s a wearable piece of art that allows you to express your adventurous spirit. Handcrafting this dragon beanie offers a rewarding experience, resulting in a cozy, eye-catching accessory that stands out. It’s a fantastic gift idea or a special treat for yourself, guaranteed to spark joy and conversation wherever you go.
Crochet Pattern: Unleash Your Inner Mythical Beast: The Whimsical Crochet Dragon Hat Pattern
Materials
- Worsted weight yarn in Teal (Color A)
- Worsted weight yarn in Mustard Yellow (Color B)
- Worsted weight yarn in Deep Red (Color C)
- Worsted weight yarn in Orange (Color D)
- Worsted weight yarn in Plum (Color E)
- Worsted weight yarn in Peach (Color F)
- Small amount of black embroidery floss
- Crochet hook (e.g., 4.0mm or G/6)
- Yarn needle
- Scissors
- Polyester fiberfill for stuffing
Abbreviations
- ch: chain
- sl st: slip stitch
- sc: single crochet
- hdc: half double crochet
- dc: double crochet
- inc: increase (2 sc in one stitch)
- dec: decrease (sc 2 together)
- FO: fasten off
- MR: magic ring
- st(s): stitch(es)
- rnd(s): round(s)
Instructions
Gauge: 4 sc and 4 rows = 1 inch (adjust hook size if necessary to achieve desired hat size)
Hat Base (Teal – Color A)
Work in continuous rounds.
- Rnd 1: Start with MR, 6 sc in MR (6)
- Rnd 2: Inc in each st around (12)
- Rnd 3: (Sc 1, inc) x 6 (18)
- Rnd 4: (Sc 2, inc) x 6 (24)
- Rnd 5: (Sc 3, inc) x 6 (30)
- Rnd 6: (Sc 4, inc) x 6 (36)
- Rnd 7: (Sc 5, inc) x 6 (42)
- Rnd 8: (Sc 6, inc) x 6 (48)
- Rnd 9: (Sc 7, inc) x 6 (54)
- Rnd 10: (Sc 8, inc) x 6 (60)
- Rnd 11: (Sc 9, inc) x 6 (66)
- Rnd 12: (Sc 10, inc) x 6 (72)
- Rnd 13-25: Sc in each st around (72) (adjust length as needed)
- FO and weave in ends.
Earflaps (Make 2 – Teal, Color A)
Attach Color A to the hat base roughly centered over where the ears would be. Work in rows.
- Row 1: Sc 12 across (12)
- Row 2: Sc in each st across (12)
- Row 3: Dec, sc 8, dec (10)
- Row 4: Sc in each st across (10)
- Row 5: Dec, sc 6, dec (8)
- Row 6: Sc in each st across (8)
- Row 7: Dec, sc 4, dec (6)
- Row 8: Sc in each st across (6)
- Row 9: Dec, sc 2, dec (4)
- Row 10: Dec, dec (2)
- FO.
Horns (Make 2)
Work in continuous rounds, stuff lightly as you go.
- Rnd 1: Start with Color F (Peach), MR, 5 sc in MR (5)
- Rnd 2: Inc in each st around (10)
- Rnd 3-4: Sc in each st around (10)
- Rnd 5: Change to Color D (Orange), (sc 3, dec) x 2 (8)
- Rnd 6-7: Sc in each st around (8)
- Rnd 8: Change to Color B (Mustard Yellow), (sc 2, dec) x 2 (6)
- Rnd 9-10: Sc in each st around (6)
- FO, leave a long tail for sewing. Create small branches from the main horn using chain stitches and slip stitches, or by working small I-cord like appendages and sewing them. Stuff horns.
Eyes (Make 2)
- Eye Base (Color B – Mustard Yellow): MR, ch 2, 10 hdc in MR, sl st to first hdc. FO, leave tail.
- Eye Outline (Color C – Deep Red): Attach Color C to the eye base. Sc around the edge, creating a slightly wavy or pointed shape at the outer corner, sl st to join. FO.
- Pupil (Black embroidery floss): Embroider a vertical line or small oval on the yellow eye base.
Snout (Color B – Mustard Yellow & Color A – Teal)
- Snout Base (Color B): Ch 10. Sc in 2nd ch from hook and across (9). Ch 1, turn. Repeat for 5 rows. Do not FO.
- Snout Ridges (Color A): Working along the top edge of the snout base, sc along, then add ch 3, sl st back into first ch for a small ridge. Repeat for 2 ridges. FO.
Brow Ridges (Make 2 – Color B – Mustard Yellow)
- Ch 8. Sc in 2nd ch from hook and across (7). FO, leave tail. Curve slightly.
Side Scales/Flames (Make 4-6 small, 2 large – Mix of Color A and C)
- Small Scales (Mix of A & C): Ch 4. Sc in 2nd ch from hook, hdc in next, dc in last. FO, leave tail.
- Large Scales (Color A): Ch 5. Sc in 2nd ch from hook, hdc in next, dc in next, trc in last. FO, leave tail.
Top Spikes/Scales (Make 3-4 – Color A with Color B outline)
- Base (Color A): Ch 6. Sc in 2nd ch from hook, hdc in next, dc in next 2, trc in last. FO.
- Outline (Color B): Attach Color B and sc around the edge of each spike. FO, leave tail.
Braids & Tassels (For each earflap)
- Cut 6 strands of each Color A, B, C, D, E (30 strands total) about 20 inches long.
- Divide into 3 sections (10 strands each), mix colors within sections.
- Braid the three sections together.
- For the tassel: Fold a separate bunch of mixed color strands (e.g., 20 strands, 8 inches long) in half. Tie this bunch securely around the end of the braid. Trim evenly.
- Repeat for the second earflap.
Assembly
- Sew the horns firmly to the top of the hat, slightly forward.
- Position and sew the eyes onto the hat, ensuring they are symmetrical.
- Sew the snout in place below the eyes.
- Sew the brow ridges above the eyes, curving them to follow the eye shape.
- Arrange and sew the large and small scales/flames around the face and sides of the hat as seen in the image, using both Color A and C.
- Sew the top spikes along the crown of the hat, slightly towards the back.
- Attach the braided ties with tassels to the ends of the earflaps.
- Weave in any remaining loose ends.